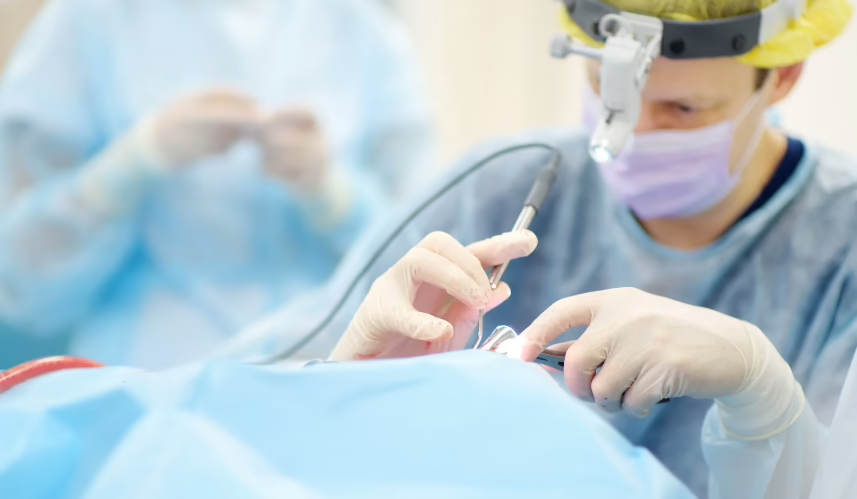
Finding a maxillofacial surgeon is not something most people do often, and when they do, it usually comes with stress, questions, and a lot of uncertainty. In Dubai, the options are broad, ranging from hospital-based specialists to surgeons working in focused private practices. That variety can be helpful, but it can also make the decision harder than it needs to be.
This article is designed as a practical list, not a sales pitch. Below, you will find a curated selection of maxillofacial surgeons in Dubai, along with clear context on their background, approach, and areas of focus. The goal is simple – to help you understand what actually matters when choosing a specialist, and to make that decision feel a bit more grounded and less overwhelming.
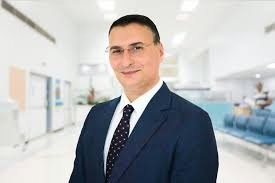
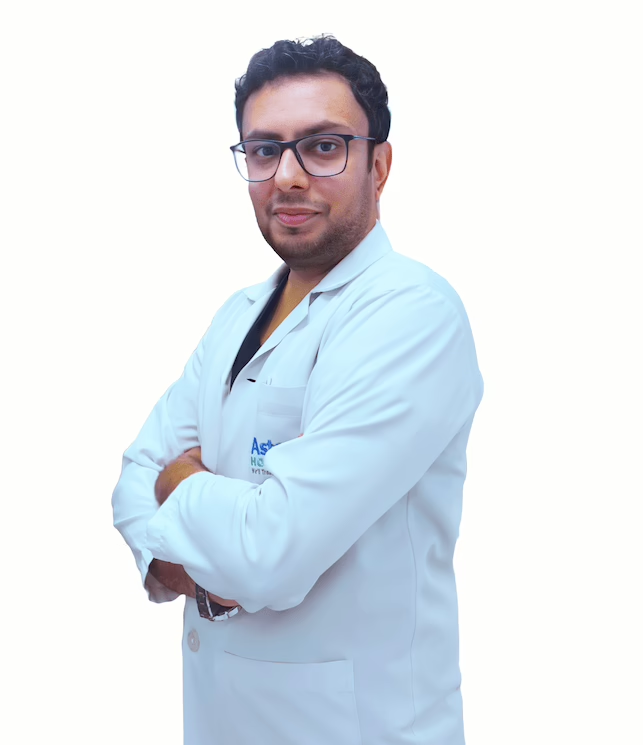
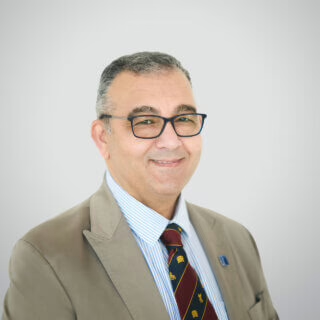
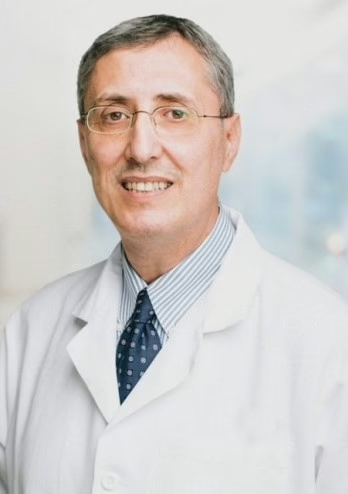
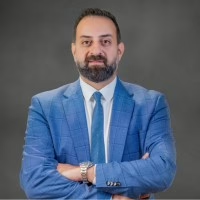
1. Dr. Antoine Habib
His work focuses heavily on surgical procedures involving the jaw, facial bones, implants, and bone-related treatments. A large part of their practice appears to deal with complex cases such as bone grafting, sinus lifting, and full-jaw rehabilitation, where surgical planning plays a central role.
Alongside clinical work, they are also involved in education and training, which shapes how cases are approached. Consultations are positioned as detailed and technical, with strong use of imaging and surgical planning tools. This kind of setup usually suits patients who already know they need maxillofacial surgery rather than general dental care.
Key Highlights:
Clinic dedicated to oral and maxillofacial surgery
Focus on jaw surgery, implants, and bone-related procedures
Strong emphasis on surgical planning and imaging
Involvement in training and professional education
Who it’s best for:
Patients requiring complex maxillofacial or jaw surgery
Implant cases involving bone loss or reconstruction
People referred specifically for surgical treatment
Patients who want a surgery-focused clinical environment
Contact information:
Website: dr-antoine.com
Phone: +971566481481
Email: dr.antoine.h@gmail.com
Address: Villa NO: 4 Al Wasl Rd – Al Manara – Dubai
Instagram: www.instagram.com/dr.antoine_habib
Facebook: www.facebook.com/Dr.antoinehabib
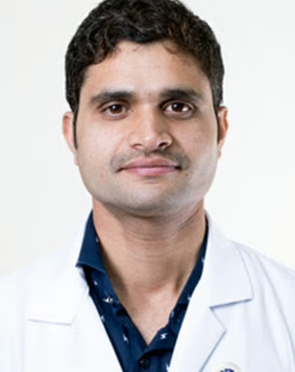
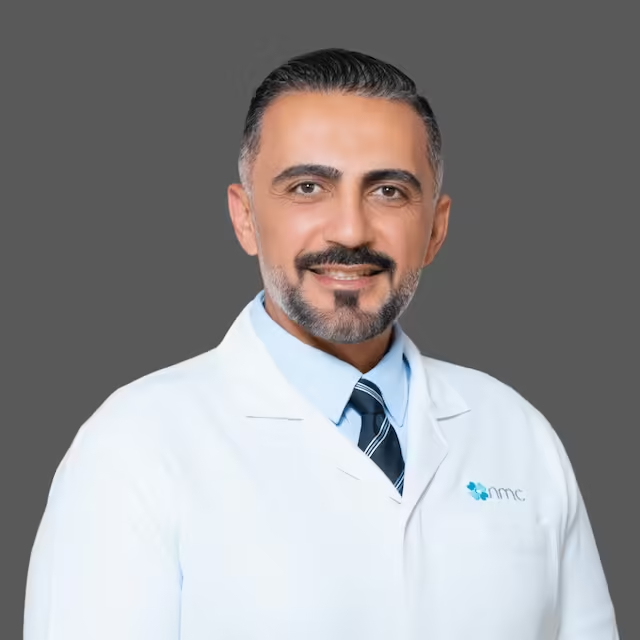
2. Dr. Nithin Shenoy
Works alongside general dentists, orthodontists, and prosthodontists, which often matters when jaw surgery, implants, or TMJ treatment connects with long-term dental planning. The setup suggests a steady, process-driven approach rather than case-by-case improvisation.
From a practical angle, their maxillofacial work usually fits into broader treatment plans that may include extractions, implant placement, or jaw-related procedures. The clinic emphasizes coordination and continuity, which can be helpful for patients who want everything handled in one system rather than being referred out for surgery and then back again.
Key Highlights:
Oral and maxillofacial surgeons working within a large dental team
Experience with implants, wisdom teeth, TMJ, and jaw-related procedures
Multiple clinic locations across Dubai
Surgical care integrated with restorative and orthodontic treatment
Who it’s best for:
Patients needing maxillofacial care as part of a larger dental plan
People who prefer treatment handled within one clinic network
Cases involving implants or jaw issues alongside other dental work
Patients looking for structured follow-up rather than one-off surgery
Practices within a hospital setting, where maxillofacial surgery is handled as part of broader medical care. His work focuses on complex jaw conditions, facial injuries, cysts, tumors, and corrective jaw surgery. Being based in a hospital environment allows their surgical cases to be managed with access to inpatient care when needed.
his approach is clinical and detail-driven, often involving conditions that go beyond routine dental surgery. This includes fracture management, cleft-related procedures, and reconstructive work. For patients with medically complex or high-risk cases, this type of setting can provide additional reassurance and continuity.
Key Highlights:
Hospital-based oral and maxillofacial surgery
Experience with jaw fractures, cysts, and corrective surgery
Management of complex soft and hard tissue conditions
Suitable for cases requiring medical-level surgical care
Who it’s best for:
Patients with complex or medically involved jaw conditions
Facial trauma or fracture-related cases
Surgical treatment of cysts or tumors
Patients who need hospital-supported care
Contact information:
Phone: +971 56 569 2424
Address: Al Entifada st, Sharjah, United Arab Emirates
Focuses on oral and maxillofacial surgery that sits between dentistry and medicine, covering both functional and reconstructive needs. His work includes jaw correction, facial trauma treatment, implant surgery, bone grafting, and management of TMJ disorders. Surgical care is offered across outpatient and inpatient settings depending on the complexity of the procedure.
His approach tends to balance surgical accuracy with recovery planning, especially in cases that affect both appearance and function. This can be relevant for patients dealing with jaw alignment issues, trauma, or conditions that impact daily activities like chewing or speaking.
Key Highlights:
Broad scope of oral and maxillofacial surgical procedures
Experience with jaw correction and facial trauma
Surgical and non-surgical management of TMJ conditions
Treatment planning across outpatient and inpatient care
Who it’s best for:
Patients with jaw alignment or corrective surgery needs
Facial trauma or reconstructive cases
TMJ disorders requiring specialist input
Patients needing both functional and structural treatment
Contact information:
Website: drluisgavin.com
Phone: +971 54 599 6177
Email: info@drluisgavin.com
Address: Gargash Hospital – Umm Suqeim St – Umm Al Sheif – Dubai Abu Dhabi
Linkedin: www.linkedin.com/in/drluisgavin
Instagram: www.instagram.com/dr.luisgavin
Facebook: www.facebook.com/profdrluisgavin
5. Dr. Shams Tabrez
Works alongside implantologists, orthodontists, and restorative dentists, which helps when surgical decisions affect bite, implants, or long-term dental stability. The clinic’s structure suggests that surgery is usually part of an overall treatment plan rather than a standalone procedure.
In practice, their maxillofacial care often covers wisdom tooth extractions, oral surgery, and jaw-related procedures that support implants or restorative work. The focus stays on coordination and follow-through, which can make the process smoother for patients who prefer everything managed in one place rather than being referred between clinics.
Key Highlights:
In-house specialist maxillofacial surgeon
Oral surgery integrated with implants and restorative care
Clinics located in Deira and Sheikh Zayed Road
Emphasis on coordinated treatment planning
Who it’s best for:
Patients needing oral or jaw surgery linked to dental treatment
Maxillofacial and oral surgery is provided as part of their wider dental offering, often supporting implant procedures, complex extractions, or jaw-related issues identified during general dental care. The setup leans toward accessibility and consistency across clinics.
His approach tends to suit patients who start with routine dental visits and later require surgical input. Instead of moving to a separate surgical center, care can continue within the same clinic group, which helps maintain continuity and keeps communication simple.
Key Highlights:
Part of a multi-location dental clinic network
Oral and surgical care integrated into general dentistry
Access to specialist services across Dubai branches
Designed for ongoing, coordinated dental care
Who it’s best for:
Patients needing surgical care alongside routine dentistry
People who value access to multiple clinic locations
Implant or extraction cases identified during checkups
Patients who prefer continuity within one clinic group
Works in a focused surgical practice where oral and maxillofacial care is handled as a dedicated specialty rather than an add-on to general dentistry. His work typically covers complex implant cases, bone regeneration, and jaw-related procedures that require careful planning and surgical accuracy. The setup reflects a clear emphasis on structured consultations and step-by-step treatment planning, especially for patients dealing with functional or structural issues in the jaw and facial area.
In day-to-day practice, the approach feels methodical and calm. Surgical decisions are usually supported by digital planning tools, which helps align expectations before treatment starts. Rather than pushing quick solutions, the focus stays on matching the procedure to the patient’s anatomy and long-term dental function, which is often what people look for when surgery is involved.
Key Highlights:
Dedicated oral and maxillofacial surgical practice
Experience with complex implant and bone-related cases
Use of guided planning for surgical procedures
Structured, consultation-led treatment approach
Who it’s best for:
Patients needing advanced implant or jaw surgery
Cases involving bone loss or structural challenges
People who prefer clear planning before surgery
Patients looking for focused maxillofacial care rather than general dentistry
Contact information:
Website: drphilippechanavaz.com
Phone: +971 555811258
Email: docteurchanavaz@gmail.com
Address: 197 Jumeira St – Jumeirah – Jumeirah 1 – Dubai – United Arab Emirates
Choosing a maxillofacial surgeon in Dubai is rarely about finding a single name that fits everyone. As this list shows, the city has a wide mix of clinics and specialists, each approaching maxillofacial care a little differently. Some focus on surgery as part of complex implant or jaw cases, others work within broader dental teams where surgery supports long-term dental treatment.
What matters most is how well a surgeon’s experience matches your situation. Jaw pain, impacted teeth, implants, TMJ issues, or corrective surgery all come with different demands. The right choice is usually the one that feels clear, well explained, and properly thought through, not rushed or oversold.
If there is one practical takeaway, it is this: look for a surgeon who takes time to diagnose properly, explains options in plain language, and works comfortably with other specialists when needed. That kind of approach tends to lead to smoother treatment and fewer surprises, which is usually what people care about most in the end.
Choosing a bariatric surgeon is not the kind of decision you make after a quick Google search. It is personal, medical, and often emotional. You are trusting someone not just with a procedure, but with a long-term change in how you live, eat, and feel in your body.
Dubai has become a serious destination for bariatric surgery, with surgeons trained across Europe, the US, and the Middle East, working in hospitals that know this field inside out. That can be a good thing, but it can also make the choice overwhelming.
That is why this article is set up as a carefully selected list. Instead of vague recommendations, we are breaking things down and highlighting bariatric surgeons in Dubai who are known for consistent results, patient follow-up, and realistic, no-nonsense approaches to weight loss surgery. Each name on this list earns its place for a reason, and the goal is simple: help you narrow your options with a bit more clarity and confidence before you take the next step.
1. Dr. Samir Rahmani
He works as a consultant bariatric, laparoscopic, and general surgeon in Dubai, with training and professional background rooted in the UK healthcare system. Their practice focuses mainly on surgical and minimally invasive weight loss procedures, alongside general surgery and diagnostic endoscopy. Rather than positioning bariatric surgery as a one size fits all solution, they approach it as a long term medical process that starts with assessment and continues well after surgery.
Their work often centers on procedures such as sleeve gastrectomy, gastric bypass, mini gastric bypass, and revisional bariatric surgery. Patients are typically guided through the reasoning behind each option, including limitations and lifestyle adjustments, before anything is decided. Follow up care is treated as part of the core process, not an extra step, with ongoing monitoring and coordination with nutrition support as weight loss progresses.
Key Highlights:
UK trained consultant in bariatric, laparoscopic, and general surgery
Focus on minimally invasive and revisional bariatric procedures
Experience with sleeve gastrectomy, gastric bypass, and endoscopic options
Practice built around structured assessment and long term follow up
Works with multidisciplinary support including nutrition guidance
Who it’s best for:
People considering surgical weight loss after other methods have not worked
Patients looking for clear explanations and realistic expectations
Those who may need revisional bariatric surgery
Individuals who value ongoing follow up rather than one time treatment
Contact information:
Website: www.drsamirrahmani.com
Phone: +971 50 234 3442
Address: 02 Jumeirah Beach Rd – opposite Burj Al Arab – Umm Suqeim – Jumeirah 3 – Dubai
He focuses exclusively on weight loss and metabolic surgery in Dubai, with a background in laparoscopic procedures built over many years of clinical practice. Their work centers on surgical solutions for obesity, particularly for patients who have already tried non surgical approaches without lasting results. Consultations usually start with a practical discussion around health history, expectations, and whether surgery is the right step at all.
Their day to day work includes sleeve gastrectomy, gastric bypass, mini gastric bypass, and revisional bariatric surgery. Follow up is treated as part of the process rather than an add on, with structured post surgery support and access to a patient support group. The overall approach leans toward steady progress, close monitoring, and helping patients adjust to long term lifestyle changes after surgery.
Key Highlights:
Focuses only on bariatric and metabolic surgery
Experience with primary and revisional weight loss procedures
Strong emphasis on post surgery follow up and support
Uses laparoscopic techniques for most procedures
Runs structured patient support programs
Who it’s best for:
People looking for surgical weight loss with ongoing follow up
Patients considering revisional bariatric surgery
Those who value structured post operative support
Individuals who want a clear, surgery focused care path
Dr. Balaji Nagammapudur works as a consultant in upper gastrointestinal and bariatric surgery, combining weight loss surgery with treatment of reflux and swallowing disorders. Their practice reflects a balanced approach, often starting with non surgical options when appropriate and moving to surgery only when it makes clinical sense. This makes their consultations more about decision making than rushing toward a procedure.
Their surgical scope includes sleeve gastrectomy, Roux en Y gastric bypass, mini gastric bypass, and revisional bariatric surgery. There is also a clear interest in adolescent and complex bariatric cases, where careful assessment and long term planning matter more than quick outcomes. Much of their work happens within a hospital based setting, alongside upper GI care.
Key Highlights:
Background in both bariatric and upper GI surgery
Experience with revisional and complex bariatric cases
Often explores non surgical options first
Treats reflux and swallowing disorders alongside obesity
Works in a hospital based multidisciplinary environment
Who it’s best for:
Patients with obesity combined with reflux or GI issues
People considering revisional bariatric surgery
Teenagers or younger patients needing careful assessment
Those who prefer a conservative, step by step approach
Practices as a consultant general, laparoscopic, upper GI, and weight loss surgeon, with training completed in the UK before moving to Dubai. Their work covers both general surgery and bariatric procedures, which often helps when patients have overlapping conditions rather than isolated weight concerns. The focus is usually on evidence based care and clear explanations rather than promises.
Their bariatric work includes sleeve gastrectomy, gastric bypass, and mini gastric bypass, delivered through minimally invasive techniques. Care is provided within a multidisciplinary setting, involving dieticians, physicians, and specialist nurses. This structure supports patients before and after surgery, especially during recovery and early lifestyle adjustments.
Key Highlights:
UK trained consultant in laparoscopic and weight loss surgery
Uses minimally invasive techniques
Works within a multidisciplinary care team
Covers both general surgery and bariatric procedures
Emphasis on evidence based decision making
Who it’s best for:
Patients with combined surgical and weight related needs
People who prefer team based care
Those looking for clear explanations and structured planning
Individuals considering laparoscopic weight loss surgery
Contact information:
Website: dubaigeneralsurgeon.ae
Phone: +971 50 181 9783
Email: info@dubaigeneralsurgeon.ae
Address: Emirates Specialty Hospital, Dubai Healthcare City, Dubai, UAE
Works as a consultant bariatric and laparoscopic surgeon in Dubai, with a practice that combines weight loss surgery and upper gastrointestinal care. Their background is rooted in European medical training, and their day to day work reflects a structured, methodical approach to obesity treatment rather than a quick fix mindset. Consultations usually focus on understanding the patient’s overall health picture before narrowing down surgical or non surgical options.
Alongside standard bariatric procedures, they also deal with complex GI conditions and revisional cases. A noticeable part of their work is focused on minimally invasive techniques and newer, reversible approaches for patients who are not ready for permanent surgery. The overall style of care leans toward precision, careful planning, and long term follow up rather than rushing into decisions.
Key Highlights:
Focus on bariatric and laparoscopic surgery
Experience with revisional and complex GI cases
Uses minimally invasive and robotic techniques
Offers both surgical and reversible weight loss options
Strong emphasis on structured assessment
Who it’s best for:
Patients with obesity and related GI conditions
People exploring alternatives to permanent surgery
Those who prefer detailed planning before treatment
Dr. Siddharth Sankar Das practices as a consultant laparoscopic and bariatric surgeon, covering both weight loss surgery and a wide range of minimally invasive general procedures. Their work often overlaps bariatric care with gallbladder, hernia, and reflux surgery, which can be helpful for patients managing more than one condition at the same time. The tone of care is practical, with an emphasis on explaining options clearly.
In bariatric surgery, their focus includes sleeve gastrectomy, gastric bypass, revision procedures, and endoscopic weight loss methods. They also work with non surgical weight management options, which are usually discussed before moving toward an operation. Care is typically delivered within a hospital setting, with attention given to recovery and step by step follow up.
Key Highlights:
Combines bariatric and general laparoscopic surgery
Works with both surgical and non surgical weight loss methods
Experience with revisional bariatric procedures
Hospital based care environment
Focus on minimally invasive techniques
Who it’s best for:
Patients with combined surgical and weight concerns
People who want to explore non surgical options first
Those needing revision or follow up bariatric care
Dr. Abdulsalam Al Taie is a consultant bariatric and laparoscopic surgeon working primarily with complex obesity cases. Their practice is closely supported by a dedicated follow up structure that includes diet and recovery guidance after surgery. Rather than treating bariatric surgery as a standalone event, the process is framed as a longer treatment path that continues well beyond the operating room.
Their work includes both surgical and endoscopic weight loss procedures, as well as care for patients with very high BMI or complicated medical histories. A team based approach is central to how care is delivered, with coordination between surgery, anesthesia, and nutrition. This makes their setup more suited to patients who need close monitoring before and after treatment.
Key Highlights:
Focus on complex and high risk obesity cases
Offers surgical and endoscopic weight loss procedures
Strong post surgery follow up structure
Team based approach with diet and recovery support
Experience with revisional bariatric care
Who it’s best for:
Patients with complex obesity or medical histories
People who need close follow up after surgery
Those considering endoscopic or surgical options
Individuals who prefer structured, team led care
Contact information:
Website: drabdulsalamaltaie.ae
Phone: +971 55 882 2937
Email: info@altaiecenter.com
Address: Al Taie Primary Health Care Center For Laparoscopic & Obesity Surgery Airport Rd, Al Muntazah – Zone 1 – Abu Dhabi, United Arab Emirates
Facebook: www.facebook.com/altaiecenter
Instagram: www.instagram.com/altaiecenter
8. Dr. Arindam Ghosh
Works as a consultant gastrointestinal surgeon with a practice that covers bariatric surgery alongside complex digestive and abdominal conditions. Their background sits more in advanced GI and colorectal work, which shapes how bariatric cases are assessed. Weight loss surgery is usually considered in the context of the patient’s broader digestive health, not as a standalone decision.
Their bariatric work often overlaps with redo surgeries and patients who have had previous abdominal procedures. Because of this wider surgical scope, consultations tend to be detailed and diagnostic in nature, especially for people with multiple conditions. Endoscopy and colonoscopy are also part of their regular clinical work, which supports a more complete view before and after bariatric treatment.
Key Highlights:
Background in gastrointestinal, colorectal, and bariatric surgery
Experience with complex and redo bariatric cases
Regular use of endoscopy and colonoscopy in assessment
Works across multiple hospital settings
Bariatric care integrated with broader GI treatment
Who it’s best for:
Patients with obesity and digestive or colorectal issues
People needing bariatric surgery after previous operations
Those who want thorough diagnostic evaluation
Individuals looking for combined GI and weight loss care
Contact information:
Website: www.drarindamghosh.com
Phone: +971581819372
Email: arindam.absolute.ag@gmail.com
Address: Jumeirah – Jumeirah 2 – Dubai – United Arab Emirates
He practices as a gastrointestinal and bariatric surgeon, handling weight loss surgery alongside a wide range of digestive procedures. Their work often includes bariatric surgery as part of broader surgical care, rather than limiting practice only to obesity treatment. This makes their approach more generalist, especially for patients dealing with multiple abdominal conditions.
In bariatric cases, they are involved in procedures such as gastric bypass and other minimally invasive weight loss surgeries. Much of the focus during consultations is on explaining surgical steps, recovery expectations, and how bariatric surgery fits into long term health management. Their practice also includes laparoscopic and robotic techniques used across different GI surgeries.
Key Highlights:
Combines bariatric and gastrointestinal surgery
Uses minimally invasive and robotic approaches
Experience across abdominal and digestive procedures
Bariatric surgery offered as part of wider GI care
Hospital based surgical practice
Who it’s best for:
Patients with both weight and digestive concerns
People seeking bariatric care within GI surgery practice
Those who want clear explanations and planning
Individuals needing laparoscopic abdominal surgery
Contact information:
Website: drmanishmadnani.com
Phone: +971 5271 22 148
Email: manish.madnani@yahoo.com
Address: NMC Specialty Hospital – 7A St – next to Bait AL Khair Building – Al Qusais – Al Nahda 2 – Dubai
He works as a general, laparoscopic, and bariatric surgeon, with bariatric care forming one part of a broader surgical practice. Their approach is grounded in routine surgical principles rather than weight loss surgery in isolation, which often shapes how patients are assessed. Consultations tend to focus on whether bariatric surgery fits the patient’s overall health picture, especially when other abdominal or metabolic issues are involved.
Their bariatric work includes sleeve procedures, bypass surgery, and revisional cases, usually performed using laparoscopic techniques. Because their scope also covers colorectal, hernia, and upper GI surgery, bariatric patients are often managed within a wider surgical framework. This can be useful for people who need more than one issue addressed or who want continuity of care beyond weight loss alone.
Key Highlights:
Combines bariatric surgery with general and laparoscopic surgery
Experience with sleeve, bypass, and revisional bariatric procedures
Works across abdominal, colorectal, and hernia surgery
Uses minimally invasive techniques where suitable
Emphasis on clear, evidence based surgical planning
Who it’s best for:
Patients with obesity and other abdominal conditions
People considering revisional bariatric surgery
Those who want bariatric care within a broader surgical setup
Individuals looking for structured, hospital based treatment
Practices across bariatric, laparoscopic, and general surgery, with bariatric care delivered alongside thoracic and upper gastrointestinal work. Their clinical setup includes dedicated clinics for different surgical needs, which allows bariatric patients to be evaluated in a focused but multidisciplinary environment. The process usually starts with understanding the patient’s anatomy, symptoms, and long term goals before narrowing down treatment options.
In bariatric cases, they are involved in laparoscopic weight loss procedures as part of a wider minimally invasive practice. Their experience across thoracic, esophageal, and general surgery often informs how reflux, breathing issues, or chest related symptoms are considered alongside weight management. This makes their approach more suitable for patients whose obesity is linked with other complex conditions.
Key Highlights:
Covers bariatric, laparoscopic, and thoracic surgery
Works within clinic based, multidisciplinary settings
Uses minimally invasive techniques for weight loss procedures
Experience with reflux and esophageal related conditions
Bariatric care integrated with broader surgical evaluation
Who it’s best for:
Patients with obesity and reflux or breathing related issues
People who prefer clinic based, specialist evaluations
Those needing bariatric care alongside other surgical concerns
Individuals looking for laparoscopic weight loss options
There is no single right answer when it comes to choosing a bariatric surgeon in Dubai, and that is kind of the point of this list. Every surgeon included here works a little differently, focuses on slightly different cases, and brings their own way of thinking to weight loss surgery. Some lean more toward complex GI work, others toward structured follow up, and some toward team based care. None of that is better or worse by default – it just depends on what you actually need.
If this list does one useful thing, it is helping you narrow the field. Instead of scrolling endlessly or getting distracted by big promises, you can look at how each surgeon works, what types of patients they usually see, and how involved they stay after surgery. That tends to matter far more in real life than titles or slogans.
The next step is simple but important. Take this list, shortlist one or two names that feel like a good fit, and book proper consultations. Ask questions, pay attention to how clearly things are explained, and trust your sense of whether the approach matches your situation. Bariatric surgery is not a quick decision, and the right surgeon is the one who helps you make it with clarity, not pressure.
Dubai has become a major hub for exceptional orthopedic care, particularly when it comes to knee issues. Whether it’s dealing with chronic arthritis, a sports injury, or the need for a full knee replacement, the city attracts highly skilled knee surgeons with international training from places like the UK, US, Germany, and beyond. These specialists are masters of the latest techniques -robotic-assisted surgery, minimally invasive procedures, custom implants, and advanced joint preservation methods. Their focus is on delivering faster recovery, minimal pain, and strong long-term mobility so patients can get back to their active lives. Many of these surgeons have extensive experience in complex cases, from partial and total replacements to intricate revisions and sports-related reconstructions. If you’re researching knee surgery in Dubai, starting with these internationally trained experts is a smart move – their reputations are built on real patient results and the use of cutting-edge technology.
1. Dr. Azam Badar Khan
Dr. Azam Badar Khan focuses on knee replacement and preventive care, drawing from more than two decades of experience in orthopedics. He trained in specialized techniques in the USA and Russia, and he applies methods such as robotic-assisted surgery and customized knee replacements. Patients often appreciate his emphasis on making advanced care available, including through initiatives that support underserved communities.
His practice centers on restoring mobility while prioritizing patient quality of life. Many who consult him mention the straightforward explanations he provides about procedures and recovery. It comes down to individual needs, but his approach tends to suit those looking for modern, hands-on knee solutions.
Key Highlights:
Over 20 years of orthopedic experience
Specialized training in the USA and Russia
Skilled in robotic and customized knee replacement
Founder of a global initiative for free knee surgeries
Dr. Ashish Soni handles knee replacement along with sports orthopedic surgery, with training completed in the UK and the US. He holds board certification and has performed thousands of procedures, many involving complex soft tissue knee issues, hip and shoulder arthroscopy, and hamstring injuries. His background includes serving as a team physician for professional sports teams in the US.
He previously founded and ran a sports surgery clinic in London while holding an NHS consultant position. Patients often highlight his experience with high-profile cases, including athletes who return to competition after treatment. The focus stays on evidence-based options, both surgical and non-surgical, delivered in a modern, minimally invasive way.
Key Highlights:
Board-certified in the UK and US
Extensive experience with professional athletes
Developed surgical techniques and published research
Hosts international visitation fellows
Worked with NFL, NHL, and Premier League players
Services:
Knee replacement
Sports injury surgery
Arthroscopic knee procedures
Hip and shoulder arthroscopy
ACL reconstruction
Hamstring injury treatment
Complex soft tissue knee pathology
Contact Information:
Website: orthoproclinic.com/team/dr-ashish-soni
Phone: +971 48359000
Email: reception@orthoproclinic.com
Address: South Tower, Dubai Science Park Towers – 3rd Floor – Al Barsha – Al Barsha South – Dubai – United Arab Emirates
Instagram: www.instagram.com/orthoproclinic
3. Dr. Hesham Al-Khateeb
Dr. Hesham Al-Khateeb specializes in knee and hip surgery, plus sports medicine, using current technologies like robotics and custom-made implants. He tailors each treatment plan to the patient, aiming for natural results and full mobility. His work covers everything from day-case procedures to more involved operations.
With more than a decade of experience from London, he concentrates on achieving quick recovery and complete function return. People who see him often note the individualized attention and the way he adapts techniques to different lifestyles. It’s all about finding the right fit for long-term movement.
Key Highlights:
Expertise in knee and hip surgery
Uses robotics and custom implants
Focus on rapid recovery
Over a decade of experience in complex procedures
Services:
Knee replacement
Hip surgery
ACL reconstruction
Sports medicine care
Customized implant procedures
Contact Information:
Website: kneesurgeondubai.ae
Phone: +971555444934
Email: Drheshamkhateeb@msn.com
Address: Emirates Hospital Jumeirah near Dubai Canal – Jumeirah – Jumeirah 2 – Dubai – United Arab Emirates
Dr. Paul Macnamara performs primary and revision knee and hip replacements, along with treatments for soft-tissue knee injuries like meniscus tears and cruciate ligament damage. He brings more than 25 years of experience, with UK board certification and additional training in Toronto, Colombia, and China. His background includes work at major joint replacement centers.
He applies enhanced recovery protocols to help patients get back on their feet sooner after major surgery. Many patients value the thorough approach he takes, especially for complex revisions. It really depends on the specific case, but his methods often align well with those needing reliable, long-lasting results.
Key Highlights:
25+ years of orthopedic experience
UK board-certified
Fellowship training in primary and revision joint replacements
Address: South Tower, Dubai Science Park Towers – 3rd Floor – Al Barsha – Al Barsha South – Dubai – United Arab Emirates
Instagram: www.instagram.com/orthoproclinic
5. Dr. Samih Tarabichi
Dr. Samih Tarabichi brings more than 35 years of experience in orthopedic surgery, with a strong focus on knee and hip replacement. He developed the Full Flexion Knee Joint in collaboration with Zimmer – an implant designed for greater range of motion that suits cultural needs like sitting on the ground for prayers. His background includes training in the US after graduating from the University of Medicine in Damascus, and he has held patents in minimally invasive knee replacement and revision surgeries.
He moved to Dubai in 1996 to build joint replacement services in the region. Patients often mention how his innovations help maintain daily activities post-surgery. It really depends on what kind of mobility someone needs, but his work has influenced knee implants used worldwide.
Key Highlights:
Over 35 years of experience
Developer of the Full Flexion Knee Joint (now Persona Knee Implant)
Holds seven international patents in arthroplasty
Founded the International Congress for Joint Reconstruction Middle East
Established the first joint surgery data bank in the Middle East
Dr. Muthanna Sartawi specializes in joint replacement surgeries, particularly knee procedures with a focus on rapid recovery. He developed a patented modified expanding surgical technique that preserves muscles and tendons around the knee, allowing many patients to walk independently and leave the hospital the same day. His training includes a fellowship from Rush Medical Center in Chicago, and he holds multiple US medical licenses.
He pioneered same-day knee replacements in the Middle East and uses 3D printing for custom implants that match the patient’s natural knee. Many who have gone through his procedures note the quick return to normal activities with minimal pain. The approach works well for those wanting faster rehab, though individual results vary.
Key Highlights:
Fellowship in joint replacement from Rush Medical Center
Holds US patents for knee and hip surgical techniques
Developed a comprehensive rapid recovery program
Performed thousands of joint replacements
Faculty member at the University of Illinois
Services:
Same-day knee replacement
Total knee replacement
Custom 3D-printed knee implants
Hip replacement surgery
Rapid recovery joint procedures
Contact Information:
Website: drsartawi.com
Phone: +971 56 258 6172
Email: info@drsartawi.com
Address: East Exit C/o King’s College Hospital London, Dubai, Marabea Al Khail Rd Dubai Hills Dubai United Arab Emirates
LinkedIn: www.linkedin.com/in/muthana-sartawi
Twitter: x.com/muthanasartawi
Instagram: www.instagram.com/drmuthanasartawi
7. Dr. Herve Ouanezar
Dr. Herve Ouanezar concentrates on knee and hip surgery along with sports medicine. He completed his medical degree in France and advanced fellowships, including one at the Hospital for Special Surgery in New York. His clinical work covers a range of knee issues like ACL injuries, meniscus tears, and complex multi-ligament problems.
He has experience as a team physician for athletes, especially in soccer, and holds diplomas from FIFA and the International Olympic Committee. People often appreciate his background in treating sports-related injuries while keeping long-term performance in mind. It’s not one-size-fits-all, but his methods tend to suit active individuals.
Key Highlights:
US fellowship-trained in sports medicine and knee surgery
Served as team physician for professional athletes
Address: South Tower, Dubai Science Park Towers – 3rd Floor – Al Barsha – Al Barsha South – Dubai – United Arab Emirates
Instagram: www.instagram.com/orthoproclinic
8. Dr. Philippe Landreau
Dr. Philippe Landreau focuses on knee and shoulder surgery, with expertise in sports injuries and degenerative conditions. He treats everything from acute ligament tears to arthritis through conservative options, osteotomy, or arthroplasty. Before Dubai, he served as Chief of Surgery at Aspetar in Qatar and worked in Paris hospitals.
His career includes more than 25 years and thousands of surgeries, plus roles with national sports teams across rugby, judo, handball, and football. Many patients value his international experience in sports medicine. The right choice depends on whether it’s a sports fix or a joint replacement situation.
Key Highlights:
More than 25 years of experience
Former Chief of Surgery at Aspetar Orthopaedic Hospital
Member of ISAKOS Board of Directors
Published over 100 journal articles and book chapters
Dr. Ali Al Belooshi specializes in lower extremity reconstruction, with a focus on hip and knee procedures including revision surgeries and robotic-assisted knee replacements. He graduated from the Royal College of Surgeons in Ireland and completed his residency at the University of Toronto, followed by fellowships in hip and knee reconstruction in Canada. Since moving to the UAE in 2008, he has worked extensively with innovative technologies in joint replacement.
Many patients appreciate his use of robotic assistance for knee procedures and the SuperPATH technique for hip replacements, which often leads to quicker recovery times. He contributed design input for the ANTHEM Knee System from Smith and Nephew. It all depends on the complexity of the case, but his background in trauma management and reconstruction suits those needing precise, tech-supported interventions.
Key Highlights:
Graduated from Royal College of Surgeons in Ireland
Completed residency and fellowships in Canada
First surgeon to perform robotic-assisted knee replacements in the Middle East
Chairman of AO Trauma in the UAE
Vice president of the UAE Orthopedic Society
Services:
Total knee replacement
Partial knee replacement
Robotic-assisted knee replacement
Total hip replacement
Revision hip and knee surgeries
Hip replacements using SuperPATH technique
Contact Information:
Website: cmcdubai.ae/doctors/dr-ali-al-belooshi
Phone: 800 262 392
Address: Dubai Healthcare City Phase 2, Al Jaddaf Dubai
Dr. Ahmed Aly Elsayed handles orthopedic surgery with an emphasis on sports medicine, knee arthroplasty, and arthroscopic procedures. He brings more than 12 years of experience, having performed numerous arthroscopic knee surgeries and knee replacements. His training includes memberships in the European Society of Sports Traumatology, Knee Surgery, and Arthroscopy, as well as the Egyptian Arthroscopy Association.
Patients often mention his work on knee, shoulder, and ankle sports injuries alongside upper and lower limb trauma. He speaks Arabic, English, and German, which helps in clear communication. The approach fits well for active people dealing with ligament issues or needing joint replacement.
Key Highlights:
Over 12 years of experience in sports surgery and knee arthroplasty
Performed thousands of arthroscopic knee surgeries
Member of European Society of Sports Traumatology, Knee Surgery, and Arthroscopy
Address: Hessa Street 331 West, Al Barsha 3, Exit 36 Sheikh Zayed Rd opposite of American School Dubai
11. Dr. Allaeldin Elbadawi
Dr. Allaeldin Elbadawi focuses on knee and hip joint replacement, revision surgery, and sports medicine procedures. He holds German board certification in orthopedics and trauma surgery, with additional subspecialties in foot and ankle. His practice includes minimally invasive techniques for hip and knee replacements to support faster patient recovery.
He graduated from Munster University in Germany and completed training at university hospitals in Bielefeld and Osnabruck before leading an orthopedic department in Germany. Many note his experience with partial knee replacements and patient-specific implants. It’s not a strict ranking, more of an overview, but his methods often appeal to those wanting less invasive options.
Key Highlights:
German board-certified in orthopedics and trauma surgery
Subspecialties in foot and ankle surgery
Experience as head of orthopedic department in Germany
Uses minimally invasive techniques for joint replacements
Dr. Imtiaz Hashmi performs total hip and knee replacements, including complex revision cases and partial procedures. He also handles arthroscopic knee surgeries for ACL reconstruction and meniscus repair, plus management of arthritis and sports-related injuries. His background includes more than 30 years of experience from UK training and senior roles.
He studied at King Edward Medical University and earned his fellowship from the Royal Colleges of Surgeons of Edinburgh. Patients often talk about his careful approach to joint preservation and realignment. It really depends on your needs, especially if you’re dealing with both adult and pediatric orthopedic issues.
Key Highlights:
More than 30 years of orthopedic experience
UK-trained with FRCS Edinburgh
Expertise in primary and revision joint replacements
Skilled in arthroscopic knee techniques
Experience in pediatric orthopedics
Services:
Total hip replacement (minimally invasive)
Total knee replacement (primary and revision)
Partial knee replacement
Arthroscopic knee surgery (ACL, meniscus)
Joint preservation surgery
Treatment of hip and knee arthritis
Sports-related hip and knee injury management
Contact Information:
Website: kingscollegehospitaldubai.com/dr/imtiaz
Email: info.mumc@kch.ae
Phone: +971 800 7777
Address: G55 – G58, Mudon Community Center – Dubai – United Arab Emirates
Dr. Tarek Jawad handles orthopedic and trauma surgery, with a particular emphasis on arthroscopic knee procedures and sports injuries. He holds German board certification as a Facharzt in Orthopedic and Trauma Surgery and has worked in both Germany and the UAE. His practice covers ligament repairs, meniscus repairs, and cartilage repairs.
Many who consult him note his membership in the German Society for Arthroscopy and Joint Surgery. He brings a few years of focused experience to these areas. The approach works well for those dealing with sports-related knee problems or needing minimally invasive fixes.
Key Highlights:
German Facharzt in Orthopedic and Trauma Surgery
Experience in Germany and UAE
Active member of German Society for Arthroscopy and Joint Surgery
Services:
Arthroscopic knee surgeries
ACL replacement
Meniscus repair
Cartilage repair
Ligament repairs
Sports injury treatment
Contact Information:
Website: www.fuh.care/doctor/dr-tarek-jawad
Phone: +971 4 414 44 44
Email: fuh@fakeeh.care
Address: Dubai Silicon Oasis Dubai, United Arab Emirates
Dr. Paul Jairaj specializes in hip and knee procedures, including replacements and arthroscopic surgeries. He trained in the UK with dual FRCS qualifications and completed traveling fellowships at centers in the United States and France. His work includes using 3D planned patient-specific prostheses for joint replacements and mini-capsular techniques for hip arthroscopy.
He pioneered certain approaches in the UK for cartilage repair and joint preservation. Patients often appreciate his focus on delaying full replacements through regeneration techniques. It’s not a strict ranking, more of an overview, but his methods tend to suit those interested in customized or minimally invasive options.
Key Highlights:
Double FRCS from Royal College of Surgeons of England
Traveling fellowships at Harvard, Hospital for Special Surgery, and others
Pioneer in 3D planned patient-specific joint replacements
Expertise in mini-capsular hip arthroscopic surgery
Recognized by International Cartilage Repair Society
Dr. Mohamed Elfekky concentrates on advanced knee surgery, with more than 25 years of experience and four international patents in ligament-sparing techniques and 3D-printing applications. He serves as Director of Tarabichi Joint Care and works across multiple hospitals in Dubai and Sharjah. His practice emphasizes minimally invasive methods and enhanced recovery protocols for knee procedures.
Many patients highlight his use of robotic assistance and complex revision work. He treats a range of knee conditions with a focus on preserving joint function. It really depends on your needs, especially if you’re looking for innovative approaches to long-term mobility.
Key Highlights:
Over 25 years of experience in knee surgery
Holder of four international patents
Director of Tarabichi Joint Care
Expertise in robotic-assisted procedures
Focus on minimally invasive knee surgery
Services:
Knee replacement surgery
Ligament-sparing knee arthroplasty
Robotic-assisted knee procedures
Complex knee revisions
Minimally invasive knee surgery
Advanced 3D-printing knee implants
Contact Information:
Website: drmohamedelfekky.com
Phone: +971 52 706 7114
Email: mohamelfekky@yahoo.com
Address: 143 Umm Suqeim St Umm Al Sheif Dubai United Arab Emirates
Dr. Haidar Kahtan Hamid specializes in orthopedic surgery with a particular focus on knee and joint procedures. He has built his practice around handling a range of knee conditions, from degenerative issues to trauma-related cases, using current surgical methods. His background includes training that emphasizes practical application in joint reconstruction and arthroscopic techniques.
Many patients appreciate the clear way he explains options and recovery expectations. He tends to take time with consultations to make sure everything is understood. It all depends on the specific knee problem, but his experience aligns well with those needing reliable surgical solutions.
Key Highlights:
Specializes in knee and joint orthopedic surgery
Focuses on arthroscopic and reconstructive procedures
Experienced in managing degenerative and traumatic knee conditions
Services:
Knee arthroscopy
Joint reconstruction surgery
Knee replacement procedures
Treatment of knee trauma
Management of degenerative knee conditions
Contact Information:
Website: azhd.ae/doctors/dr-haidar-kahtan-hamid
Phone: +971 4 378 6666
Email: info@azhd.ae
Address: Al Zahra Hospital Dubai – Sheikh Zayed Road – Dubai – United Arab Emirates
Dr. Ossama Abdallah concentrates on orthopedic surgery, with strong emphasis on knee and hip replacements along with sports injuries. He applies minimally invasive approaches when possible and has experience in both primary and revision joint procedures. His practice includes treating a variety of knee pathologies, from ligament injuries to advanced arthritis.
Patients often mention his straightforward discussions about surgical plans and post-op care. He combines traditional techniques with newer methods depending on the case. The right fit comes down to what someone needs most – quicker rehab or handling a more complicated joint issue.
Key Highlights:
Expertise in knee and hip replacement surgery
Skilled in minimally invasive orthopedic techniques
Wrapping this up, picking the right knee surgeon in Dubai really comes down to what your situation calls for – whether it’s a straightforward replacement, a tricky revision, dealing with a sports injury, or something more specialized like robotic-assisted work. The city has some seriously experienced surgeons who bring international training and modern techniques to the table, so you’re not short on solid options. From what I’ve seen digging into all this, the key is finding someone whose approach matches your goals: faster recovery, preserving as much natural function as possible, or handling complex cases with confidence. Don’t just go by online hype – read real patient stories, check how they communicate, and trust your gut during the consultation. Knee problems can be frustrating enough without adding stress over the choice of surgeon. Ultimately, Dubai’s orthopedic scene keeps getting better, and with the right specialist, most people walk away (literally) feeling like they got their life back. Take your time, ask all the questions, and you’ll land in good hands.
Breast augmentation remains one of the most popular cosmetic procedures in Dubai, with many women seeking natural-looking, proportionate results. The city offers an excellent selection of highly skilled, internationally trained surgeons who deliver outstanding outcomes. Top specialists stand out thanks to their extensive experience, board certifications, and mastery of modern techniques -from precise implant placement and choice of premium brands to minimally invasive methods and fat transfer. They focus on customized solutions that enhance your natural shape while minimizing scarring and recovery time. When choosing a surgeon, patients consistently praise those who offer thorough consultations, 3D imaging previews, clear communication and attentive aftercare. The best results come from finding a surgeon whose aesthetic vision aligns perfectly with your goals. Dubai’s competitive scene means you have access to truly world-class expertise-a few consultations are usually all it takes to feel confident in your choice.
1. Dr. Frank Conroy
Dr Frank Conroy brings more than twenty years of experience in plastic and reconstructive surgery to his practice in Dubai. He trained and worked in respected medical centers across Europe, North America, and the Middle East, which shaped his approach to cosmetic procedures. Patients often mention how approachable and empathetic he is, especially when it comes to discussing concerns about surgery or choosing the right option.
Breast augmentation forms a key part of his work, with a focus on natural-looking results that suit each person’s body. He uses tools like Crisalix AI technology during consultations to help patients visualize outcomes. Recovery instructions are clear, and follow-ups are scheduled to keep everything on track.
Key Highlights:
Over twenty years of surgical experience
Training in Europe, North America, and the Middle East
Emphasis on patient comfort and clear communication
Use of Crisalix 3D imaging for previewing results
Services:
Breast augmentation
Implant placement (sub-glandular or sub-muscular)
Saline and silicone implant options
Breast lift combined with augmentation
Recovery guidance and post-operative care
Contact Information:
Website: drfrankconroy.com
Phone: +971 5051 57413
Email: drfrank@genesis-dubai.com
Address: North Tower, 3rd & 4th Floor, Dubai Science Park, Dubai UAE
Dr Matteo Vigo developed a deep interest in plastic surgery early on and has built his practice around blending artistic principles with medical science. He takes time to really listen to what patients want and aims to turn those desires into practical, satisfying results. The whole process feels supportive from the first visit through to the final outcome.
His consultations center on understanding individual needs and explaining every step clearly. Many patients appreciate the calm, attentive atmosphere in his office. He keeps things focused on personal wellbeing rather than rushing decisions.
Key Highlights:
Combines art and science in every case
Strong focus on patient-centered decisions
Emphasis on feeling understood and supported
Constantly evolving with modern techniques
Services:
Breast augmentation
Cosmetic surgery consultations
Aesthetic medicine procedures
Personalized treatment planning
Contact Information:
Website: www.plasticsurgerydubaiuae.com
Phone: +971 56 2825 825
Email: booking@matteovigo.com
Address: HEALTHBAY VITALIA Al Wasl Road, Umm Al Sheif, Dubai
LinkedIn: www.linkedin.com/in/matteo-vigo-125613b
Facebook: www.facebook.com/DrMatteoVigo
Twitter: x.com/drMatteoVigo
Instagram: www.instagram.com/drmatteovigo
3. Dr. Rory McGoldrick
Dr Rory McGoldrick specializes in breast procedures and works out of Dubai. He handles a range of cosmetic surgeries with a careful, detail-oriented approach. Patients often note his straightforward explanations and the way he addresses specific goals.
His practice includes thorough discussions about options and expected results. The focus stays on achieving balanced, natural enhancements that fit individual body types.
Key Highlights:
Dedicated breast surgery specialist
Clear communication during consultations
Experience with various cosmetic breast procedures
Services:
Breast augmentation
Breast lift
Combined augmentation and lift
Implant revision
Contact Information:
Website: www.drrorymcgoldrick.com
Phone: 971543871452
Email: enquiries@drrorymcgoldrick.com
Address: CosmeSurge Hospital Jumeirah Beach Rd opposite Burj Al Arab Umm Suqeim Second Jumeirah 3 Dubai
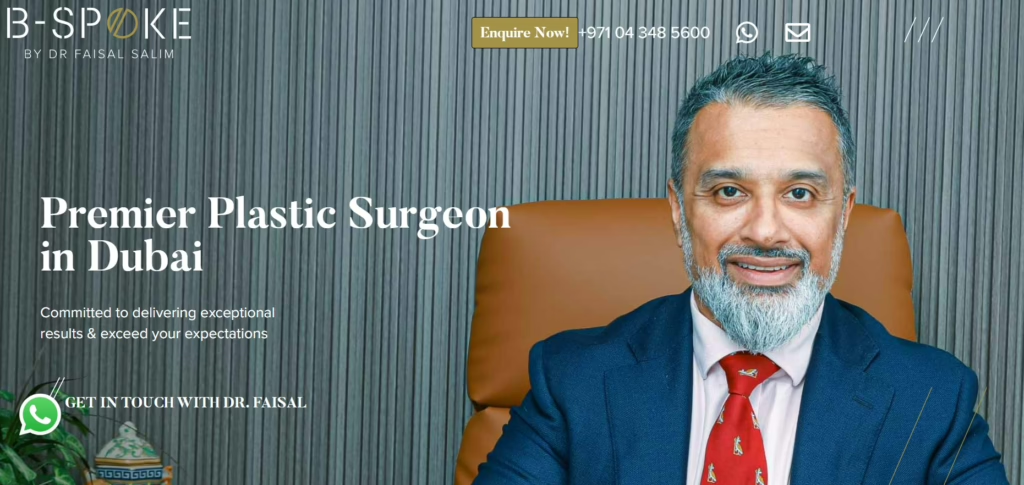
Dr Faisal Salim performs breast augmentation and lift procedures in Dubai with an emphasis on individualized care. He holds certification from the American Board of Plastic Surgery and brings experience across different cosmetic surgeries. Many patients value his thorough answers and comfortable bedside manner.
The combination of lift and implants helps address changes from pregnancy, weight loss, or aging. He discusses implant placement options (sub-glandular or sub-muscular) and uses tools like Crisalix 3D simulation to preview results. Realistic expectations and safety remain central throughout the process.
Key Highlights:
American Board of Plastic Surgery certified
Experience in breast augmentation and lift
Use of Crisalix 3D simulation
Focus on natural-looking outcomes
Before-and-after photos available for review
Services:
Breast augmentation
Breast lift (mastopexy)
Breast augmentation with lift
Breast implant exchange or removal
Breast reduction
Fat transfer to breasts
Gynaecomastia correction
Crisalix 3D simulation
Contact Information:
Website: www.faisalsalim.com
Phone: +971 04 348 5600
Email: info@faisalsalim.com
Address: Dr Imran Tahir Aestheticare Villa 929B Al Wasl Rd Dubai
Dr Allen heads the team at Elite Cosmetic Surgery in Dubai, where he focuses on a range of plastic and cosmetic procedures. His background includes solid training and hands-on work in aesthetic surgery, with an emphasis on delivering results that align with each patient’s expectations. People who consult him often point out how he takes the time to go through details carefully during discussions.
Breast augmentation sits among the procedures he performs regularly, with attention given to implant choices and placement for a balanced appearance. Consultations involve talking through options like types of implants and surgical approaches. Recovery plans get explained clearly to help things go smoothly afterward.
Key Highlights:
Experienced in various cosmetic procedures
Focus on personalized consultations
Emphasis on natural-looking outcomes
Services:
Breast augmentation
Body contouring procedures
Facial aesthetic surgeries
Contact Information:
Website: elitecosmeticsurgery.ae
Phone: +971 4 431 2396
Email: INFO@ELITECOSMETICSURGERY.AE
Address: Unit 101, 1st Floor, Building 72 Dubai Healthcare City Umm Hurair 2nd, Oud Metha Road Dubai, UAE
Instagram: www.instagram.com/eliteclinicdubai
6. Dr. Nazmi Baycin
Dr Nazmi Baycin, a board-certified Turkish plastic surgeon, has practiced since 2000 and moved his base to Dubai in 2016. He holds a DHA license and belongs to the American Society of Plastic Surgeons as an international member. His work covers breast surgeries along with other cosmetic areas, and he often explores innovative ways to handle cases.
He pays close attention to achieving results that look natural while addressing specific patient concerns. Techniques he uses include approaches designed to minimize visible scarring in breast procedures. Patients who have seen him mention the detailed explanations he provides about options and expected healing.
Key Highlights:
Practicing since 2000
DHA licensed in Dubai since 2016
International member of ASPS
Known for scarless breast augmentation techniques
Services:
Breast augmentation
Breast surgeries
Body contouring
Facial rejuvenation
Cosmetic genital procedures
Contact Information:
Website: www.nazmibaycin.com
Phone: +971 54 7491111
Address: City walk – 13th St – Al Wasl – Dubai
LinkedIn: www.linkedin.com/in/nazmi-baycin
Facebook: www.facebook.com/dr.nazmi.baycin.clinic
Twitter: x.com/artistsurgeon
Instagram: www.instagram.com/dr.nazmi_baycin
7. Dr. Jaffer Khan
Dr Jaffer Khan runs Aesthetics International and The Nova Clinic in Dubai after years of training in the UK and Ireland. He completed his plastic surgery residency and gained further experience at hospitals like St. Bartholomew’s and the Royal London, plus a fellowship in London. His interests include breast and body contouring procedures.
Many who consult him appreciate the thorough way he covers individual goals and options. He has introduced certain laser technologies in the region earlier on and keeps up with advancements in aesthetic work. Breast procedures form a significant part of what he handles.
Key Highlights:
Trained in the UK and Ireland
First in the region to pass the Joint Royal Colleges fellowship exam
Special interest in breast contouring
Experience with facial resurfacing techniques
Services:
Breast augmentation
Breast lift
Body contouring
Facial aesthetic surgery
Reconstructive breast procedures
Contact Information:
Website: aesthetics.ae/experts/dr-jaffer-khan
Phone: +97143845600
Email: Info@aesthetics.ae
Address: Utamah Villa # 1049c, Intersection of Al Wasl Rd & Al Thanya Rd, Jumeirah, Dubai, UAE.
Dr Tarek Bayazid works at Amwaj Polyclinic in Dubai and handles a variety of breast, facial, and body procedures. His training includes residency in Serbia followed by advanced courses like the Melbourne Advanced Facial Anatomy Course. He focuses on outcomes that stay proportional and natural-looking.
Patients often choose him for his approach that avoids exaggeration and prioritizes subtle refinements. Breast aesthetic procedures make up part of his regular work, with emphasis on techniques that respect tissue and support long-term results. He personalizes each plan based on lifestyle and natural features.
Dr Hanan Lyor handles aesthetic and reconstructive surgeries with a particular focus on breast procedures like augmentation, reduction, and lifting. He also works on facial surgeries such as rhinoplasty and blepharoplasty, plus reconstructive cases including breast reconstruction after mastectomy. Born and trained entirely in Paris, he recently set up in Dubai to continue applying the same standards he developed there.
Consultations start with listening closely to what patients want, followed by a personalized plan that might include one or more procedures. Surgeries take place at well-equipped private hospitals in Dubai, and follow-up care continues at the clinic for up to a year afterward. He keeps his skills sharp by attending and speaking at international conferences on the latest techniques.
Key Highlights:
Trained exclusively in Paris
Skilled in breast augmentation and lifting
Performs reconstructive breast procedures
Offers post-operative follow-up for up to one year
Dr Shehzadi Tasneem Sultan practices as a board-certified plastic surgeon in Dubai with a focus on body contouring, breast procedures, and facial rejuvenation. She started working in the UAE back in 2016 at Rashid Hospital and has since moved through various hospitals and private clinics. Her background includes training in Pakistan and ongoing involvement with educational updates from industry partners.
Patients often appreciate her tailored approach that considers individual goals for both surgical and non-surgical options. She stays active in professional groups like the Emirates Plastic Surgeons Society and ICOPLAST. Breast augmentation and lift procedures form part of her regular work.
Key Highlights:
Board-certified plastic surgeon
Practicing in Dubai since 2016
Member of Emirates Plastic Surgeons Society
Focus on patient-centered care
Services:
Breast augmentation
Breast lift
Liposuction
Tummy tuck
Facial rejuvenation
Botox treatment
Scar revision
Contact Information:
Website: drshehzadicontours.com
Phone: +971509272624
Email: shehzaditasneemsultan@gmail.com
Address: The Iridium Building Umm Suqeim St Al Barsha 1 Office 103 Dubai
Dr Mario Russo brings Italian training and experience to his plastic surgery practice in Dubai, where he specializes in cosmetic and reconstructive work. He has held positions at various clinics and hospitals in the region, including as head of plastic surgery at one location. His career spans multiple countries with a consistent emphasis on natural results.
He performs breast procedures alongside other body and facial surgeries. Memberships in several professional societies keep him connected to current standards. Patients note his attention to detail during consultations and planning.
Dr Luciano Tracia specializes in breast surgeries such as augmentation, lifting, reduction, and reconstruction, along with body contouring techniques like liposuction and fat transfer. He trained across Europe in places like Italy, Sweden, Spain, and Belgium, which gave him a broad perspective on advanced methods. In Dubai, he works as director of plastic surgery at a major hospital.
He uses 3D imaging to help plan for symmetrical and harmonious outcomes. Consultations cover options for both surgical and non-surgical treatments like Botox and fillers. Many who see him value the clear explanations about achieving natural proportions.
Key Highlights:
Trained in Italy, Sweden, Spain, and Belgium
Uses 3D imaging for planning
Specializes in breast augmentation and lifting
Director of Plastic Surgery at American Hospital Dubai
Dr Dragana Spica practices as a specialist in reconstructive and plastic surgery in Dubai with nineteen years of experience in aesthetic and reconstructive procedures. She completed her medical education and specialized training at the University of Belgrade in Serbia, followed by residency at the Clinical Centre of Serbia University Hospital. Before settling in Dubai, she worked in several aesthetic surgery facilities in the UAE.
Breast augmentation and lifting procedures form part of her regular practice, along with reduction and gynecomastia corrections. She also handles facial aesthetic surgeries and body contouring with techniques like Vaser liposuction. Patients who see her often mention the detailed consultations where she discusses options and expected outcomes.
Dr Sahar Al-Kazzaz has practiced plastic and reconstructive surgery for more than thirty years, with a focus on cosmetic procedures since the mid-nineties. She relocated to Dubai in 1999 and became the first full-time female plastic surgeon in the UAE. Her work includes advanced body contouring after massive weight loss, and she holds accreditation as a Surgeon of Excellence in that area.
Breast surgeries make up a significant part of her practice, from augmentation with implants or fat transfer to lifts, reductions, and corrections for asymmetry or previous complications. She often combines procedures for mommy makeovers and uses regenerative approaches like stem cells in some cases. Consultations involve listening to goals and explaining surgical and non-surgical options clearly.
Key Highlights:
Practicing in Dubai since 1999
Accredited Surgeon of Excellence in body contouring
Address: Novomed Face Villa 5B, 5B street corner Jumeirah Beach Rd Jumeirah 1 Dubai
LinkedIn: www.linkedin.com/company/novomedcenters
Facebook: www.facebook.com/NovomedCenters
Instagram: www.instagram.com/novomedcenters
15. Dr. Vikesh Vij
Dr Vikesh Vij works as a board-certified plastic surgeon in Dubai with a background rooted in a family of doctors. He completed intensive training at a high-volume hospital in India before moving to the UAE. His approach centers on listening carefully to patients’ concerns and creating customized plans.
Breast procedures like augmentation, lifts with or without implants, reductions, and fat transfers form part of his expertise. He also handles body contouring such as tummy tucks and mommy makeovers. Many patients note his calm demeanor and clear communication throughout the process.
Key Highlights:
Board-certified plastic surgeon
Trained in India
Focus on personalized treatment plans
Active in national and international conferences
Services:
Breast augmentation
Breast lift
Breast lift with implants
Breast reduction
Breast fat transfer
Breast implant removal
Minimally-invasive breast augmentation
Contact Information:
Website: drvikeshvij.com
Phone: +971 58 575 1066
Email: contact@drvikeshvij.com
Address: Kaya Skin Clinic – Tower, I-Rise – Unit No. G 06 & 07 Al Thannyah – First – Barsha Heights – Dubai
Dr Amani Landoulsi Helal brings more than twenty years of experience in plastic, reconstructive, and cosmetic surgery from France, Tunisia, and the UAE. She holds a PhD in maxillofacial, plastic, and aesthetic surgery and trained in microsurgery, robotic surgery, and medical lasers at universities in Paris and Nancy. She also serves as an associate professor of medicine.
Her practice includes breast surgery, body contouring, and post-weight-loss reconstruction, with an emphasis on natural results. She collaborates with other specialists for comprehensive care. Patients appreciate her attention to safety and detail during consultations.
Address: Villa#1184, AI Wasl Road, Ai Manar, Umm Suqeim 2, Dubai
Facebook: www.facebook.com/drkayleaestheticlinic
Instagram: www.instagram.com/drkayleclinic
Conclusion
Wrapping this up, picking the right surgeon for breast augmentation in Dubai really comes down to what feels right for you personally. There are plenty of skilled, experienced doctors here who know their stuff when it comes to natural-looking results, safe techniques, and making sure you feel heard every step of the way. The key is doing your homework – read real patient stories, look at before-and-after photos that actually show similar body types to yours, and go to a few consultations. You’ll quickly get a sense of who listens properly, who explains things clearly without rushing you, and who seems genuinely focused on your goals rather than pushing a one-size-fits-all approach. It all depends on what you’re after- subtle enhancement, more noticeable volume, or maybe combining it with a lift. Dubai has a ton of options, so take your time, trust your gut, and choose someone you click with. When you do, the whole process tends to feel a lot less daunting and the results way more satisfying in the long run.
Cataracts gradually steal your clear vision, but the right surgeon can change that quickly and safely. Dubai attracts some of the most skilled eye doctors in the region, and many patients come specifically for their expertise. The top cataract surgeons here are known for their vast experience, precision, and consistently excellent outcomes. They routinely perform modern phacoemulsification- a gentle, small-incision procedure using ultrasound to remove the cloudy lens and replace it with a high-quality artificial one. Many also specialize in premium multifocal, toric, and extended-depth-of-focus lenses that correct astigmatism, presbyopia, or both at the same time. These leading specialists often combine years of international training, mastery of the latest laser-assisted techniques when appropriate, and a very personalized approach- even in more complex cases involving other eye conditions. If blurry vision, glare, or halos are starting to interfere with your daily routine, consulting one of Dubai’s top cataract surgeons is a smart move. Take your time to read recent patient experiences and choose the surgeon whose approach feels right for you -sharp, bright vision is worth the research.
1. Dr. K R Sathish
Dr. K R Sathish has practiced ophthalmology in Dubai since 2001, bringing decades of experience from earlier roles in India and Oman. He focuses on cataract surgery and other eye conditions, drawing from his postgraduate training at Mysore Medical College where he earned his MBBS, DOMS, and MS degrees. Patients often appreciate his approach to personalized treatment plans for issues like cataracts, glaucoma, and refractive errors.
His career includes time as a senior specialist in Paediatric ophthalmology and oculoplasty in Muscat, followed by positions at Welcare Hospital and City Centre Clinic in Dubai. Dr. Sathish has also presented papers and delivered lectures at conferences, and he served as a professor and head of an institute in India for several years. He performs phacoemulsification with foldable IOL implantation, femtolaser cataract surgery, eyelid and orbital procedures, and manages anterior segment and external eye diseases.
Key Highlights:
Practicing in Dubai since 2001
Extensive background in anterior segment and paediatric ophthalmology
Experience with femtolaser and phacoemulsification techniques
Presented numerous papers and guest lectures
Former professor and head of ophthalmology institute
Services:
Femtolaser cataract surgery
Phacoemulsification with foldable IOL implantation
Eyelid and orbital surgeries
Management of anterior segment and external eye diseases
Dr. Sherif Emerah works as a cornea and refractive surgery consultant at Eye Consultants Center in Dubai Healthcare City. With more than 26 years in ophthalmology, he handles a range of procedures focused on the cornea and vision correction. His training includes an MD from Ain Shams University in Egypt, a fellowship at Louisiana State University Eye Center, and FRCS from Glasgow.
Before joining his current practice, he led the cornea and refractive unit at Magrabi Eye Hospital in Dubai for eight years. Dr. Emerah has performed thousands of refractive surgeries and stays active in the field through memberships in international societies and publications. He often speaks at ophthalmology meetings both locally and abroad.
Key Highlights:
Over 26 years of experience
Fellowship training in cornea, cataract, and external eye diseases in the USA
FRCS from Royal College of Surgeons, Glasgow
More than 7000 refractive procedures performed
Member of International Society of Refractive Surgery and American Academy of Ophthalmology
Services:
Refractive surgery including LASIK, Femto LASIK, SMILE, and PRK
Phakic and aphakic IOL implantation
Keratoconus treatment with cross-linking and corneal inlays
Dr. Caroline Therese Paulson is a specialist ophthalmologist with over 15 years of experience treating various eye conditions. She holds an MBBS and MS in Ophthalmology from institutions in India, plus a fellowship in cataract surgery from Ahalia Foundation Eye Hospital in Kerala. She also earned MRCS from the Royal College of Physicians and Surgeons in Glasgow.
At Canadian Specialist Hospital in Dubai, she handles both medical and surgical eye care for patients of all ages. Dr. Paulson has worked in hospitals across the UAE and India, focusing on clear communication and individualized plans. She speaks several languages fluently, which helps with diverse patient groups.
Key Highlights:
Over 15 years of clinical experience
Fellowship training in cataract surgery
MRCS from Glasgow
Multiple publications in international journals
Multilingual in English, Hindi/Urdu, Malayalam, Kannada, and basic Arabic
Services:
Phacoemulsification cataract surgery with monofocal, EDOF, and multifocal lenses
Pterygium excision with conjunctival autograft
Management of ocular surface disease and dry eye
Glaucoma and uveitis diagnosis and treatment
Diabetic retinopathy management with intravitreal injections
Dr. Suhair Twaij serves as a consultant ophthalmologist at Moorfields Eye Hospital Dubai, focusing on adult and paediatric strabismus surgery, paediatric ophthalmology, and adult cataract surgery. She relocated to the UAE from the UK, where she worked as a consultant at the Royal Victoria Hospital in Belfast since 2013 and acted as clinical lead for the adult motility service in Northern Ireland starting in 2014. Her training began with a degree from Baghdad University Medical School in 1994, followed by UK training from 2004 in England and Northern Ireland, leading to her CCT in ophthalmology in 2012 and FRCOphth in the same year.
She handles complex squint surgeries with adjustable techniques, double vision correction, adult cataract surgery with implants, and Botox for certain conditions. Dr. Twaij has practiced at various UK hospitals like Altnagelvin Area Hospital and Bristol Eye Hospital, plus King Hussein Medical City in Jordan. She has published papers in areas like medical retina and paediatric ophthalmology, and she holds memberships in relevant professional associations. She also works as a GCAA approved specialist aviation medical examiner.
Key Highlights:
Consultant since relocating to UAE
UK CCT and FRCOphth qualifications
Experience at multiple UK and Jordan hospitals
Published in Medline on ophthalmology topics
Member of Royal College of Ophthalmologists and strabismus associations
Services:
Adult cataract surgery with implant
Complex adult and paediatric squint surgery
Double vision correction
Paediatric ophthalmology assessments and treatments
Botox for squints, double vision, and blepharospasm
General ophthalmology including glaucoma and diabetic retinopathy care
Dr. Anurag Mathur practices as a specialist in ophthalmology at Emirates Hospital Day Surgery in Motor City, Dubai, with a focus on cornea, cataract, and refractive surgery. He completed his MBBS and Master’s in Ophthalmology in India, followed by fellowship training in cornea and anterior segment from Hyderabad, plus additional fellowships in cornea, cataract, and refractive surgery from international institutions. He has 12 years of experience and has held teaching positions at eye institutes in India.
He performs procedures like LASIK, PRK, cataract surgery, and corneal transplants, along with managing conditions such as keratoconus, glaucoma, dry eye, infections, and allergies. Dr. Mathur is a member of the American Society of Ophthalmology and has received awards from the American Academy of Ophthalmology. Patients sometimes mention quick relief from infections and gentle care for children in reviews.
Key Highlights:
12 years of experience
Fellowships in cornea, cataract, and refractive surgery
Member of American Society of Ophthalmology
Awards from American Academy of Ophthalmology
Teaching background in Indian eye institutes
Services:
Cataract surgery
LASIK eye surgery
PRK laser surgery
Corneal transplantation
Pterygium excisions
Management of keratoconus, glaucoma, dry eye, and eye infections
Dr. Umashankar Ramachandran is a specialist ophthalmologist who has completed around 10,000 eye procedures across more than 19 years of practice. He trained at Madras Medical College in India for his graduation and post-graduation, earned DNB from India, and holds FRCS from Glasgow, UK. He also completed fellowship training in anterior segment, oculoplasty, and paediatric ophthalmology at Sankara Nethralaya in India.
His career path includes consultant work in trauma, oculoplasty, and cataract services at Sankara Nethralaya for four years, clinical attachments in UK hospitals, and roles as medical director at eye hospitals in India and previously in Oman and Dubai. He specializes in various surgical techniques for eye conditions.
Key Highlights:
Over 19 years in ophthalmology
FRCS from Glasgow UK
Fellowship at Sankara Nethralaya
Previous medical director positions in India and Dubai
Experience in trauma and oculoplasty services
Services:
Phacoemulsification with monofocal, multifocal, and toric IOL
LASIK and phakic IOL (ICL)
Refractive lens exchange
Keratoconus management with collagen cross linking
Dr. Sivakami A Pai works as a consultant ophthalmologist at Al Zahra Hospital Dubai, handling vitreo-retinal conditions alongside cataract surgeries. She holds qualifications including MBBS, MS, DNB, FRCS from Glasgow, and a PhD in vitreo-retina. With 25 years in ophthalmology and 14 years practicing in the UAE across government and private hospitals, she manages surgical and medical retina issues like retinal detachment, diabetic retinopathy, and age-related macular degeneration.
Her focus includes ocular trauma, uvea, and retinopathy of prematurity, plus clinical research. Dr. Pai belongs to several professional groups such as the American Society of Retina Specialists, Royal College of Surgeons, and various Indian and European ophthalmic societies. She speaks English, Hindi, Kannada, and Tamil.
Key Highlights:
25 years in ophthalmology
14 years practicing in UAE
FRCS Glasgow and PhD in vitreo-retina
Member of multiple international ophthalmic societies
Expertise in vitreo-retinal surgery and clinical research
Services:
Cataract surgery
Surgical and medical management of vitreo-retinal diseases
Ocular trauma management
Uvea treatment
Retinopathy of prematurity care
Contact Information:
Website: azhd.ae/doctors/dr-sivakami-a-pai
Phone: +971 4 378 6666
Email: info@azhd.ae
Address: Al Zahra Hospital Dubai – Sheikh Zayed Road – Dubai – United Arab Emirates
Dr. Randa Kashif serves as a specialist in general and pediatric ophthalmology at Magrabi Eye Hospital, where she joined in 2022. She earned her Master’s in Ophthalmology from Ain Shams University, along with MRCSEd from Edinburgh and FICO. Her practice covers anterior segment surgeries and various diagnostic tools like OCT and corneal topography.
She treats conditions from dry eye and refractive errors to glaucoma and retinal issues, with special attention to pediatric cases like amblyopia and squint. Dr. Kashif has presented research at international meetings, including a talk on amblyopia treatment in France in 2024, and she belongs to associations focused on strabismus, dry eye, and Egyptian ophthalmology.
Key Highlights:
Over 14 years of experience
MRCSEd and FICO qualifications
Speaker at ESA-ISA 2024 Joint Meeting
Member of International Strabismological Association
Proficient in ocular diagnostics like OCT and fluorescein angiography
Services:
Cataract extraction
Pterygium removal
Chalazion excision
Intravitreal injections
Management of dry eye, glaucoma, and refractive errors
Pediatric amblyopia treatment and squint correction
Contact Information:
Website: magrabihealth.ae/doctors/dr-randa-kashif
Phone: +97144370606
Email: dubai@magrabi.com.sa
Address: Dubai Healthcare City, Al Razy Building, No 64, Block E, Dubai, UAE
Facebook: www.facebook.com/Magrabi.Hospital.AE
Twitter: x.com/magrabiuae
Instagram: www.instagram.com/magrabihealthuae
9. Dr. Basel AlFaaouri
Dr. Basel AlFaaouri is a consultant ophthalmologist at HMS Mirdif Hospital, fluent in English and Arabic. He graduated with an MD from Damascus University in 2001, earned the Syrian Board in Ophthalmology in 2006, and completed a glaucoma fellowship at Eye Surgical Hospital in Syria. His earlier career in Damascus included roles at several specialized hospitals focusing on anterior segment and glaucoma.
Since moving to the UAE in 2013, he has worked at Dubai Hospital, Vasan Eye Care Center, Saudi German Hospital, and now the HMS group. Dr. AlFaaouri handles a range of eye surgeries and belongs to societies like the European Society of Cataract and Refractive Surgery and Emirates Society of Ophthalmology.
Key Highlights:
Syrian Board in Ophthalmology
Glaucoma fellowship in Syria
Practicing in UAE since 2013
Experience at multiple Dubai hospitals
Member of European and Emirates ophthalmic societies
Services:
Cataract surgery
Glaucoma surgery for adults and pediatric patients
Dr. Mandeep Lamba practices ophthalmology in Dubai with a focus on retinal and cataract care. He completed postgraduate training at Dr. Agarwal’s Eye Hospital in Chennai, India, followed by a retina and uvea fellowship at the Eye Research Centre there. Additional advanced surgical retina fellowship training took place at the New York Eye & Ear Infirmary in the USA, where he also studied ocular oncology.
His qualifications include FACS from the American College of Surgeons and FRCS from Glasgow, UK. Dr. Lamba previously served as consultant and head of the retinal foundation at Dr. Agarwal’s in Chennai. He maintains a practice centered on retinal conditions and cataract procedures.
Key Highlights:
Postgraduate from Dr. Agarwal’s Eye Hospital Chennai
Retina and uvea fellowship from Eye Research Centre Chennai
Advanced surgical retina fellowship in New York
Fellow of American College of Surgeons
FRCS Glasgow UK
Services:
Cataract surgery
Retinal care
Uvea management
Contact Information:
Website: drmandeeplamba.com
Phone: +971 524 227 000
Address: Prime Hospital, Al Garhoud, Opp to Dubai international Airport, Dubai
Dr. Vasu Kumar offers eye care services in Dubai as an ophthalmologist specializing in vitreo-retina and cataract. He holds an MBBS and MS in Ophthalmology from institutions in Delhi, India, plus FAICO in Vitreo-Retina from 2012 and FICO from the UK in 2014. He also completed fellowship training in retinopathy of prematurity at LV Prasad Eye Institute in India.
Before his current role at NMC Dubai, he worked as an associate consultant in vitreo-retina and cataract services at Centre for Sight Group in New Delhi. Dr. Vasu Kumar has presented papers and posters at conferences and contributed chapters to ophthalmology textbooks. He speaks English and Hindi fluently.
Key Highlights:
MS Ophthalmology from Guru Nanak Eye Centre Delhi
FAICO Vitreo-Retina 2012
FICO UK 2014
ROP fellowship at LV Prasad Eye Institute
Previous associate consultant at Centre for Sight New Delhi
Services:
Cataract surgery
Vitreo-retina procedures
Retinopathy of prematurity treatment
Contact Information:
Website: retinacaredubai.com
Phone: +971 50 294 4374
Email: retinacaredubai@gmail.com
Address: Community East , West Gate Entrance 1 Green Community Village Dubai United Arab Emirates
Dr. Sohaib Mustafa serves as director of ophthalmology services at American Hospital Dubai after nine years as a consultant at Moorfields UAE. He graduated with commendation in medicine from the UK and completed general ophthalmology residency there, including training at Royal Victoria Eye and Ear Hospital in Dublin and Moorfields Eye Hospital in London. His fellowships cover adult and paediatric glaucoma from Manchester University Hospital and Moorfields.
He holds fellowships from the European and UK boards in ophthalmology, membership in the Royal College of Ophthalmologists, and a postgraduate diploma in cataract and refractive surgery from the UK. Dr. Mustafa also works as an adjunct clinical associate professor at Mohammed Bin Rashid University and acts as a certified aviation ophthalmologist. His research covers glaucoma medications and surgical techniques.
Key Highlights:
UK medical degree with commendation
Glaucoma fellowships at Manchester and Moorfields
Postgraduate diploma in cataract and refractive surgery
Director of ophthalmology at American Hospital Dubai
Certified aviation ophthalmologist
Services:
Premium cataract treatment
FemtoLaser cataract surgery
Complex glaucoma-related cataract surgery
Refractive surgery including LASIK, LASEK, PRK
Adult and paediatric glaucoma management
Diabetic retinopathy care
Contact Information:
Website: eyesurgeon.ae
Phone: 971 563009234
Email: msohaib@ahdubai.com
Address: American Hospital Dubai – 19th St – Oud Metha – Dubai – United Arab Emirates
Dr. Hani Sakla practices as a consultant eye surgeon in Dubai, performing various cataract, corneal, and refractive procedures. He introduced phacoemulsification and sutureless cataract surgery with foldable lenses in the region. He also brought in techniques like intravitreal injections for diabetic macular edema, photodynamic therapy for macular degeneration, and femtosecond laser for ZLASIK.
His work includes implanting multifocal and toric lenses early in the area, plus toric implantable contact lenses for keratoconus patients. Dr. Sakla chairs the scientific committee of the Emirates Medical Association since 2001 and organizes international ophthalmology conferences in Dubai. He reviews for a prestigious ophthalmology journal.
Key Highlights:
Introduced phacoemulsification in Dubai
First to implant Restor multifocal lenses outside US and Europe
Chairman of scientific committee Emirates Medical Association
Organizes international ophthalmology conferences
Reviewer for prestigious ophthalmology journal
Services:
Cataract and intraocular implant surgeries
Corneal surgeries and keratoplasties
Phakic lenses ICL and clear refractive lens exchange
All refractive procedures with excimer laser including LASIK and femtosecond LASIK
Address: Sheikh Zayed Rd – Exit 41 – Umm Al Sheif building – Office 119 – Next to Metropolitan Hotel – Opposite to Garden Centre
Instagram: www.instagram.com/spanisheyeclinic
14. Dr. Amit Jain
Dr. Amit Jain practices as an ophthalmologist in Dubai, specializing in phacoemulsification, cornea, cataract, and refractive surgery. His clinic offers various eye care options, from routine exams to treatments for conditions like myopia, keratoconus, and secondary cataracts. Facilities include modern ophthalmic equipment for procedures such as laser vision correction and corneal surgeries.
He provides individualized treatment plans and performs operations using international standard materials and tools. Consultations cover a range of issues, with options for ortho-k lenses and IPCL implantation. The practice operates with appointments available through phone or direct booking.
Key Highlights:
Specializes in phaco, cornea, and refractive surgery
Offers individualized treatment programs
Uses equipment meeting international standards
Provides consultation for various eye conditions
Services:
Cataract surgery
Corneal surgery
Laser vision correction
IPCL implantation
Ortho-K lenses
Keratoconus management
Treatment for secondary cataracts
Contact Information:
Website: dramitjaindubai.com
Phone: 00971568965755
Email: amit.jain@nmc.ae
Address: NMC Specialty Hospital, Al Nahda 2, Dubai.
Facebook: www.facebook.com/DrAmitJainSpecialist
Instagram: www.instagram.com/dr__amit_jain
15. Dr. Anchitha Meenu R
Dr. Anchitha Meenu R works as an ophthalmologist at Aster Clinic with more than six years of experience in general ophthalmology and medical retina. She trained at places like Aravind Eye Hospital and handles diagnosis and management of vitreoretinal disorders, ocular inflammation, plus laser therapies and intravitreal injections. Her background includes skills in OCT interpretation, advanced retinal imaging, neuro-ophthalmology, and paediatric eye care.
She performs cataract and glaucoma screening, squint evaluation, and amblyopia management. Dr. Anchitha has published in peer-reviewed journals and holds qualifications such as FICO, FRCS from Glasgow, CertRCOphth, and FAICO in Retina. Patient care focuses on combining clinical accuracy with a compassionate approach.
Picking the right cataract surgeon in Dubai really comes down to what feels like the best fit for you. Sure, experience counts, and so does how comfortable you are during that first chat- but it’s also about the little things, like whether the doctor takes time to explain options without rushing you out the door, or if the follow-up care actually feels supportive instead of just routine. Dubai has a solid lineup of skilled ophthalmologists who handle everything from straightforward phaco procedures to trickier cases with premium lenses or combined conditions. The tech here is current, recovery times are usually quick, and plenty of people walk away seeing sharper and brighter than they have in years. Still, no two eyes are the same, so it pays to do your homework – read recent patient stories, compare a couple of consultations, maybe even ask about lens choices that match your lifestyle. At the end of the day, clear vision is one of those things worth getting picky about. Trust your gut, ask the questions that matter to you, and go with the surgeon who makes you feel confident and heard.
Dubai has built a strong reputation for high-quality healthcare, particularly in specialized areas like hand and upper extremity surgery. Whether you’re facing fractures, nerve injuries, carpal tunnel syndrome, arthritis, or sports-related hand problems, the city offers access to highly experienced hand surgeons with international training and advanced skills in both conservative and surgical care. Many specialists here focus on comprehensive treatment-starting with precise diagnosis, trying non-invasive options first, and moving to minimally invasive procedures, arthroscopy, microsurgery, or complex reconstructions when needed. They handle a full range of cases, from simple trigger finger releases to severe trauma, pediatric conditions, and delicate nerve or tendon repairs. Personalized plans are common, often involving hand therapists for better recovery. The right choice depends on your exact condition, but looking for surgeons with strong backgrounds in hand-specific surgery, good patient feedback on communication and outcomes, and experience matching your issue usually points you toward reliable care in Dubai. Here are some solid options for hand surgery in Dubai- it’s not a strict ranking, more of an overview of specialists who come up often when people need help with wrist issues, fractures, nerve problems, or reconstruction.
1. Dr Ehab Aldlyami
Dr Ehab Aldlyami a UK-trained consultant orthopedic surgeon handles a range of hand and wrist cases with a focus on both common and tricky conditions. Experience stretches back over two decades, including time as a consultant in the UK before shifting to Dubai. Qualifications include FRCS in trauma and orthopedics plus a European diploma in hand surgery, and there’s involvement in the Emirates Hand Surgery Society as vice president.
He deals with plenty of nerve-related work along with bone and tendon fixes. Publications exist in scientific journals, and memberships cover British hand and orthopedic groups plus local ones. Patients often end up here for detailed assessments of ongoing pain or instability.
Dr Srikanth Varma Racherla, an orthopedic and hand surgeon based at Zulekha Hospital since 2018, with a background that includes fellowships in hand and microsurgery plus arthroscopy. Training comes from Indian institutions like Ganga Hospital and Sancheti, and there’s teaching experience with medical students along the way. Focus stays on using minimally invasive options when possible to speed things up.
He covers a broad mix of hand problems from birth defects to vascular injuries. Over 2500 surgical procedures sit in the background, and research papers plus seminar talks keep things current. Emergency availability stands out for urgent cases.
Key Highlights:
More than 15 years in orthopedics and hand surgery
FNB fellowship in hand and micro surgery
24/7 emergency support available
Peer-reviewed articles published
Lectures delivered at scientific events
Services:
Complex fracture treatment
Tendon and ligament repairs
Peripheral nerve injury management
Carpal tunnel syndrome care
Wrist surgery
Paralyzed hand reconstruction
Tumor removal in hand
Congenital anomaly corrections
Contact Information:
Website: drsrikanthvarma.com
Phone: +971-502127689
Email: srikanthv.varma@gmail.com
Address: Al Nahda Park – 204th Rd Al Nahda – Al Nahda 2 Dubai United Arab Emirates
Dr Farid Ghasemzadeh Mojaveri a consultant orthopedic surgeon who zeroes in on upper limb and hand/wrist trauma, mixing surgical fixes with non-operative approaches. Emphasis falls on precision for nerve issues, tendons, arthritis, and injuries from accidents. Minimally invasive methods appear frequently, alongside regenerative options like PRP or stem cells when surgery isn’t the first step.
Common cases include carpal tunnel releases, trigger finger fixes, and complex fracture stabilizations. Ultrasound guidance helps with injections, and plans often start conservative before going to the operating room. Recovery gets attention through structured pain control and rehab steps.
Key Highlights:
Specializes in minimally invasive and reconstructive techniques
Handles regenerative treatments like PRP and stem cell therapy
Focuses on nerve compression and joint issues
Practices at King’s College Hospital Dubai among other facilities
Services:
Carpal tunnel and cubital tunnel release
Trigger finger and De Quervain’s management
Wrist arthroscopy
Fracture fixation for complex hand trauma
Dupuytren’s contracture correction
Wrist and finger arthritis treatments including replacement
Ultrasound-guided injections
Ganglion and lump removal
Contact Information:
Website: drfaridortho.com
Phone: +971 50 871 2847
Address: King’s College Hospital, Dubai Hills, Alkhail Road, Marabea’ East Exit
Facebook: www.facebook.com/drfaridortho
Instagram: www.instagram.com/drfaridortho
4. Dr Mohammad Ali
Dr Mohammad Ali specialist in hand and wrist orthopedic surgery at Medcare Orthopaedics & Spine Hospital, with roots in Cairo University training followed by microsurgery work in Singapore and a Harvard-affiliated fellowship in the US. Past roles include time at Rashid Hospital and teaching in residency programs. Microvascular skills stand out for replantations and delicate reconstructions.
He manages everything from fingertip amputations to sports injuries and chronic conditions like arthritis or nerve entrapments. Hundreds of nerve repairs and replantations factor into the track record, plus revisions for problems like non-unions or failed prior fixes. Conference speaking keeps the approach fresh.
Key Highlights:
MSc in orthopedic and trauma surgery
Microsurgery training in Singapore
Travelling fellowship at Massachusetts General Hospital
Member of Emirates Hand Surgery Society and others
Address: Near Al Safa Park Al Hadiqa Rd Dubai, UAE
LinkedIn: www.linkedin.com/company/medcareae
Facebook: www.facebook.com/medcareae
Instagram: www.instagram.com/medcareae
5. Dr Sherif Ahmed Ban
Dr Sherif Ahmed Ban a consultant orthopedic surgeon focuses on upper extremity issues, particularly around the hand, wrist, and elbow. Training started at Cairo University with graduation in 2002, followed by masters and doctorate work there over nine years of teaching and practice. Time spent in Germany, Switzerland, Saudi Arabia, and then UAE from 2014 onward adds to the background, including a short AO fellowship in hand and reconstructive surgery in Tubingen, Germany.
He covers trauma, ligament repairs, fractures that haven’t healed right, arthritis management with small joint options, and nerve procedures from elbow down. Wrist arthroscopy gets emphasis for its minimally invasive side, and hand surgery under local anesthesia comes up as an approach that skips general anesthesia for quicker recovery. Speaking happens regularly in the MENA area on hand and wrist topics.
Key Highlights:
Over 20 years in orthopedic surgery
Trained in Germany, Switzerland, Saudi Arabia, and UAE
AO fellowship in hand and reconstructive surgery
Speaks English, Arabic, German
Practices at Burjeel Specialty Hospital Dubai
Services:
Complex trauma treatment for elbow, forearm, wrist, hand
Wrist and hand ligament repair with arthroscopy
Management of ununited or malunited fractures
Arthritic joint treatment including small joint replacement
Nerve surgery including carpal tunnel release
Tendon repairs for biceps, triceps, flexor, extensor
Dr Marouane Bouloudhnine a French board-certified consultant orthopedic surgeon, specializes in hand, wrist, elbow, shoulder, and nerve reconstruction surgeries. Experience comes from more than 30 years in Europe, using both open and arthroscopic methods. He founded hand and upper limb surgery centers in France, started an SOS Hand Center in Tunisia, and set up a private SOS Hand to Shoulder Center in Burjeel Dubai.
Communication with patients and staff gets noted as a priority in his approach. An MBA in healthcare management sits alongside the surgical side, and past work as a professional football goalkeeper adds an interesting note. Recognition includes the French Knight of the Legion of Honour back in 2011.
Key Highlights:
French Board Certified with Mayo Clinic fellowship
Over 30 years of experience from Europe
Founded multiple hand surgery centers
Awarded Chevalier de la Légion d’Honneur
Practices in Dubai including Burjeel and Dr. Sulaiman Al Habib Hospital
Services:
Hand and wrist surgery
Elbow and shoulder procedures
Nerve reconstruction
Arthroscopic techniques
Upper limb surgeries overall
Contact Information:
Website: drmarouane.com/hand-specialist-in-dubai
Phone: +971 544 226 123
Email: infodrmarouane@gmail.com
Address: Sheikh Zayed Rd Al Safa 2 Al Safa Dubai United Arab Emirates
Dr Sami Hassan, a UK Board-certified consultant orthopedic hand and wrist surgeon, brings fellowship training from places like Pulvertaft Hand Centre in Derby and Chelsea & Westminster Hospital in London. Previous role as clinical lead for hand surgery at Northampton General Hospital NHS Trust in the UK factors in, along with qualifications including FRCS in trauma and orthopedics, plus both British and European hand surgery diplomas- the only one in the MENA region with both.
He deals with acute fractures, tunnel syndromes, arthritis types, wrist instability, and delayed injury presentations like non-unions. Sports injuries and arthroscopy interest him particularly, with experience treating athletes from motor racing, football, and ice hockey. Teaching continues as an associate clinical professor at Gulf Medical University.
Dr Ahmed Elsayed Semaya is a consultant orthopedic surgeon with a background as professor of orthopedics and traumatology at Alexandria University in Egypt focuses on hand, wrist, and elbow conditions alongside microsurgical work. Clinical experience builds from more than 25 years, including time as a clinical fellow in reconstructive microsurgery at Assiut University Hospitals. Education includes M.B.B.Ch from 1995, M.Ch in orthopedics from 2000, and M.D. in orthopedics from 2006, all from Alexandria University, plus advanced training in wrist arthroscopy in France and the USA, and elbow arthroscopy in Switzerland.
Adult and obstetric brachial plexus surgery sits alongside hand and wrist procedures, often involving arthroscopy, microsurgical reconstruction, free flap techniques, and fixes for post-traumatic or tumor-related bone defects. Peer-reviewed papers number around 19 in various journals. Practice takes place in Ajman at Saudi German Hospital, with Arabic and English spoken.
Key Highlights:
Professor at Alexandria University since 2013
More than 25 years in orthopedics
Clinical fellow in reconstructive microsurgery
Advanced training in wrist and elbow arthroscopy
Speaks Arabic and English
Practices at Saudi German Hospital Ajman
Services:
Hand, wrist, and elbow surgery
Arthroscopic procedures for wrist and elbow
Microsurgical reconstruction
Brachial plexus surgery for adults and obstetric cases
Free flap surgery
Reconstruction of bone defects from trauma or tumors
Address: Hessa Street 331 West, Al Barsha 3, Exit 36 Sheikh Zayed Rd opposite of American School Dubai
9. Dr Bernard Lallemand
Dr Bernard Lallemand is an orthopedic specialist, concentrates on hand and wrist along with elbow, forearm, shoulder, and upper arm conditions. Core work covers sports injuries, tendinopathies, ligament and tendon repairs or reconstructions, degenerative diseases like osteoarthritis and rheumatoid arthritis, plus fractures and dislocations. Arthroscopy, arthroplasty, nerve releases, microsurgery for grafts, and secondary reconstructions appear in the scope, including Dupuytren’s, Kienbock disease, and congenital or secondary deformities.
Elbow and forearm issues include tennis or golfer’s elbow, osteochondritis dissecans, arthroscopy, fracture management, malunion or non-union fixes, and ligament reconstruction. Shoulder and upper arm cover instability, AC joint injuries, pectoralis major tears, fractures, and rotator cuff or labral work through arthroscopy. Languages spoken are English, French, and German.
Key Highlights:
Focus on hand, wrist, elbow, shoulder
Handles sports injuries and degenerative conditions
Proficient in arthroscopy and microsurgery
Speaks English, French, German
Practices at Mediclinic facilities
Services:
Hand and wrist sports injuries management
Tendinopathies like trigger finger and De Quervain’s
Ligament and tendon primary or secondary repair
Osteoarthritis and rheumatoid arthritis care
Fracture and dislocation treatment for hand and wrist
Nerve entrapment release including carpal tunnel
Dupuytren’s disease and Kienbock disease
Microsurgery with vascularized bone or nerve graft
Dr Christiana Savvidou is an orthopedic hand surgeon, who provides care for common and specialized conditions in the hand and upper limb across children and adults. Medical degree and orthopedic residency came from the University of Athens in Greece, followed by fellowships in hand surgery at Tampere University in Finland and hand plus microsurgery at Christine M. Kleinert Institute, University of Louisville in Kentucky, USA. Past practice includes positions in Cyprus, Indiana, and Kentucky in the USA, with involvement in hand transplantation programs at University of Louisville.
Publications exist in the field along with teaching roles in Greece and the USA, plus awards for contributions. Approach emphasizes evidence-based options, non-surgical and surgical treatments tailored to individual needs, and building ongoing patient relationships. Charity work involves providing medical treatments, and personal interests include piano playing.
Key Highlights:
Fellowships in Finland and USA (Kleinert Institute)
Experience in adult and pediatric hand surgery
Involved in hand transplantation programs
Publications and teaching in Greece and USA
Practices in Dubai
Services:
Adult and pediatric hand surgery
Nerve reconstruction
Microsurgery procedures
Management of complex hand and wrist sports injuries
Upper limb condition treatment
Non-surgical and surgical options for hand issues
Contact Information:
Website: drchristianasavvidou.com
Phone: 971585426377
Email: drchristianasavvidou@gmail.com
Address: 2nd Floor, Al Kharbash Building Billqetair Street (37B Street – Dubai – United Arab Emirates
Dr Kutaiba Salman is a Danish board-certified consultant orthopedic surgeon, who covers general orthopedics and trauma with particular attention to hand and wrist injuries alongside foot and ankle problems. Training includes residency in Baghdad hospitals followed by specialized work in Denmark and Sweden. Memberships exist in the Danish Orthopaedic Society, Danish Medical Association, Swedish Orthopaedic Society, SICOT, and American Academy of Orthopaedic Surgeons.
Advanced arthroscopic procedures feature for shoulders, knees, ankles, while sports medicine and trauma cases get handled regularly. Languages spoken include English, Arabic, Danish, Swedish, and Norwegian. Practice takes place at Adam Vital Hospital.
Key Highlights:
Danish board certification in orthopedic surgery
Extensive training in Denmark and Sweden
Member of multiple orthopedic societies including DOS, SOF, SICOT, AAOS
Dr Rami Hamed is a consultant orthopedic and spine surgeon who focuses on trauma, sports injuries, and spinal procedures with hand and wrist surgery included among specialties. Training started at Aleppo Medical School in 1993, followed by MSc in trauma and orthopedics from Royal National Orthopedic Hospital (UCL), FRCS from Edinburgh, and British CCT in trauma and orthopedics. Minimally invasive endoscopic techniques appear frequently for spinal work alongside arthroscopy for joints like shoulder and knee.
Hand and wrist cases sit alongside shoulder, knee, foot and ankle, elbow, pediatric orthopedics, joint replacement, fracture management, and orthobiologic treatments. Founder of Dr. Rami Hamed Center in Dubai Healthcare City.
Dr Yasser Khattab is a consultant plastic, aesthetic, reconstructive, and hand surgeon who handles hand surgery alongside aesthetic procedures like breast and body contouring. Training includes graduation in Egypt in 1993, residency and master’s in plastic surgery at Alexandria University Hospital until 1998, followed by work in Egypt, Saudi Arabia, Ireland (multiple hospitals including UCHG Galway, Cork University, Beaumont, Mater’s, Temple St. Children’s). European Board certifications exist in plastic surgery (EBOPRAS 2009) and hand surgery (FESSH 2009).
Practice moved to Dubai in 2009 as a consultant. Publications appear in journals, with regular conference presentations and memberships in ESPRS, ISAPS, European Hand Society. Languages are English, Arabic, and French.
Key Highlights:
European Board certified in plastic and hand surgery
Fellow of Royal College of Surgeons Ireland
Trained in Egypt, Saudi Arabia, Ireland
Practices at Mediclinic City Hospital Dubai
Speaks English, Arabic, French
Services:
Hand surgery procedures
Aesthetic and reconstructive plastic surgery
Breast surgery including augmentation, lift, reduction
Dr Robert Hierner is a professor and consultant in plastic, reconstructive, hand surgery, regenerative medicine, and burns brings together training from top centers in Germany, France, US, UK, and Belgium. Experience spans more than 30 years across renowned universities and institutions. He edits and authors textbooks including a two-volume standard on hand surgery in German and a five-volume one on plastic surgery, along with many publications and lectures.
Hand surgery includes congenital malformations, trauma with brachial plexus and peripheral nerve work in adults and newborns, aging hand conditions, degenerative arthritis, hand rejuvenation, Dupuytren’s, rheumatoid hand, tumors, and reconstruction with replantation. Philosophy centers on precise diagnostics, individualized plans that combine methods for best medical and aesthetic outcome with least impairment, patient safety, high hygiene, and full discussion of all options. Practice happens at Fakeeh University Hospital DSO in Dubai, with English, French, German, Dutch spoken.
Key Highlights:
German board in plastic surgery and hand surgery
Belgian board in oncology surgery
University diploma in microsurgery from France
Editor of major hand and plastic surgery textbooks
Professor and former chair of plastic surgery in Belgium
Practices at Fakeeh University Hospital Dubai
Services:
Brachial plexus and peripheral nerve reconstruction
Congenital and pediatric hand deformities
Trauma and defect reconstruction including replantation
Degenerative arthritis and aging hand care
Dupuytren’s disease and rheumatoid hand management
Address: Atelier Clinic, Villa no 03, Umm Suqeim 03 – Dubai, UAE
LinkedIn: www.linkedin.com/company/prof-bob-dubai
Instagram: www.instagram.com/profbobdubai
15. Dr Afschin Ghofrani
Dr Afschin Ghofrani is a German board-certified plastic and hand surgeon who addresses hand conditions within a broader practice of plastic, aesthetic, reconstructive surgery, burns, and trauma. Career began after graduation from RWTH Aachen in 1992, with training at the university hospital in Aachen covering plastic/reconstructive surgery, hand surgery, burns, and intensive care. Later roles included assistant medical director at St. Agatha Hospital in Cologne and heading a plastic and hand surgery department at Evangelic Hospital in Giessen before moving to Dubai in 2010 to establish Aestheticon.
Hand surgery covers aesthetic anti-aging, arthritis treatment, deformities, correction surgeries, injuries including sports-related ones, carpal tunnel syndrome, trigger finger, Dupuytren’s disease, musician’s dystonia, and cysts. Memberships include German Association of Plastic Surgeons, German Association of Hand Surgery, Emirates Plastic Surgery Society.
Key Highlights:
German board certified in plastic and hand surgery
Trained at RWTH Aachen university hospital
Established Aestheticon in Dubai
Member of DGPRÄC, DGH, Emirates Plastic Surgery Society
Address: Aestheticon DMCC, Fortune Executive office 904 Cluster T Al Thanyah Fifth Jumeirah Lakes Towers – Dubai
Facebook: www.facebook.com/Aestheticon
Instagram: www.instagram.com/aestheticon_dubai
Conclusion
Wrapping this up, picking the right hand surgeon in Dubai really comes down to what your hand (or wrist) is throwing at you right now. Some people need someone who’s done hundreds of brachial plexus repairs on newborns, others just want quick relief from a stubborn trigger finger or carpal tunnel that’s ruining sleep. Does the doctor listen long enough to get your story, or does it feel like they’re already halfway to the operating theatre? Are non-surgical options (therapy, injections, splints) genuinely on the table first, or is surgery the default answer? How do they explain risks, recovery time, and what “good enough” function might look like for your job or hobbies? Those conversations usually tell you more than any diploma on the wall. Dubai’s healthcare scene moves fast, so availability, wait times, and which hospital or clinic feels comfortable can tip the scales too. Hands are too important-and too annoying when they don’t work-to rush the decision.
Take your time, ask the awkward questions, and you’ll land with someone who gets it.
Dubai draws people worldwide for rhinoplasty thanks to its pool of experienced nose surgeons skilled in both cosmetic tweaks and functional improvements. Whether you want a smoother profile, better breathing via septoplasty, tip work, or revision surgery, the city has specialists with strong international backgrounds who prioritize natural, face-harmonious results. The most capable ones often blend ENT knowledge with facial plastic surgery expertise, making it easier to address form and function together. They frequently use advanced methods like preservation rhinoplasty, ultrasonic techniques, or closed approaches that minimize scarring and speed healing. Reviews commonly highlight thorough consultations, 3D imaging previews, and honest discussions about realistic outcomes. These surgeons stand out for handling diverse cases -ethnic rhinoplasty, tricky revisions with grafts, or combining aesthetics with sinus/breathing fixes- with natural-looking results, low complications, and good follow-up care. Prices depend on complexity, but safety and long-term satisfaction remain the focus. If you’re thinking about rhinoplasty in Dubai, prioritize surgeons who focus heavily on nasal procedures. Check recent patient feedback, credentials, and how they handle consultations. The right fit makes the process feel much smoother- and the final nose looks and feels like it was always yours.
1. Dr. Dirk Kremer
Dr. Dirk Kremer runs his practice at Perfect Doctors Clinic in Dubai, where he handles cosmetic and plastic surgery procedures. He trained initially in Munich Germany, continued studies in New York and San Diego, then completed postgraduate work and board certification in plastic and reconstructive surgery back in Munich in 2003. Further refinement came through time in California with experienced surgeons. He has practiced in Dubai since 2013, drawing patients from Europe, Australia, Canada, the US, and GCC countries. His background includes microsurgery, maxillofacial surgery, and burn surgery, plus ongoing learning from surgeons worldwide.
Emphasis stays on natural-looking results through precise techniques and artistic planning. He encourages consultations with several surgeons to find the right fit. Many patients highlight the consistent care from initial meeting through follow-ups.
Key Highlights:
Board certified plastic surgeon Germany 2003
Training in Munich New York San Diego California
Practice in Dubai since 2013
Experience in microsurgery and burn surgery
Focus on natural outcomes
Services:
Rhinoplasty
Facial cosmetic procedures
Body contouring surgeries
Breast surgeries
Contact Information:
Website: www.perfectdrs.com/doctors/doctor-1
Phone: +971 56 191 7976
Email: concierge@perfectdrs.com
Address: Villa 888 Al Wasl Rd – Jumeirah – Umm Suqeim 1 – Dubai – United Arab Emirates
Facebook: www.facebook.com/PerfectDoctorsClinic
Instagram: www.instagram.com/perfectdoctorsclinic
2. Dr. Ankit Kothari
Dr. Ankit Kothari practices as a specialist in plastic and aesthetic surgery at Aster Cedars Hospital and Clinic in Jebel Ali, Dubai. He brings more than nine years in cosmetic surgery, reconstructive work, microsurgery, and trauma care after earning MCh and DrNB in plastic surgery, plus MRCS from Edinburgh. Fellowships with ISAPS and IAAPS round out his training, which included time with surgeons in Brazil, India, and the UAE. He speaks English, Hindi, and Gujarati.
Procedures cover rhinoplasty alongside body contouring, liposuction, tummy tucks, facelifts, breast surgeries, fat grafting, Botox, and dermal fillers. Reconstructive side includes microvascular work, hand surgery, burn care, and complex wounds. Patients often point out his emphasis on customized plans during consultations.
Address: Aster Cedars Hospital, Jebel Ali Street No 2 Dubai
LinkedIn: www.linkedin.com/company/asterhospitals
Facebook: www.facebook.com/AsterHospitalsUAE
Twitter: x.com/aster_hospital
Instagram: www.instagram.com/aster_hospital
3. Dr. Levente Deak
Dr. Levente Deak practices as an ENT surgeon and facial plastic surgeon in Dubai. He holds an MD and PhD, along with European Board certification in ENT surgery and dual board certification (USA and EU) in facial plastic surgery. Licensed under GMC in the UK plus DHA and DHCC in the UAE, he has more than 15 years in these fields after working in various hospitals as a consultant in the UK and UAE. Fellowships include ENT training at Northwestern University in Chicago and a rhinoplasty fellowship in Bergamo, Italy – where he picked up the Spoendlin and Bekesy awards during research work. Publications come out regularly in international journals, up to around 15 per year, and he keeps current by attending congresses while also training younger ENT doctors and speaking at events.
Patients see him daily at Cosmosurge in Dubai. His focus stays on nasal issues, combining form and function in rhinoplasty since he views symmetry and breathing as interconnected. Research remains part of his routine, and five-star reviews often come up in feedback. Many clients note how he spends time explaining options clearly before moving forward.
Key Highlights:
Dual board certified in facial plastic surgery (USA and EU)
Dr. Shim Ching practices plastic surgery at Quttainah Specialized Hospital in Dubai while based primarily in Honolulu Hawaii. He earned his medical degree in Canada through McGill University and the University of British Columbia followed by advanced training in Brazil Switzerland and the United States. Dual board certification comes from the American Board of Plastic Surgery and the Canadian Board of Plastic Surgery. Membership includes the American Society for Aesthetic Plastic Surgery the International Society of Aesthetic Plastic Surgery and the Canadian Society of Plastic Surgeons. His work often involves facial procedures with particular attention to rhinoplasty and chin augmentation for balanced outcomes.
Procedures at the hospital cover a mix of surgical and non-surgical options including rhinoplasty facelifts neck lifts eyelid surgery breast augmentation reduction liposuction tummy tucks and Brazilian butt lifts. He also handles dermal fillers and lipofilling for facial rejuvenation. Many patients comment on how consultations feel detailed and focused on natural results that fit individual features.
Key Highlights:
Dual board certified American and Canadian Plastic Surgery
Training in Brazil Switzerland United States
Member American Society Aesthetic Plastic Surgery
Member International Society Aesthetic Plastic Surgery
Dr. Dima Ghaith serves as an ENT consultant at Emirates Specialty Hospital in Dubai Healthcare City. She holds certifications from both the Arab Board and European Board in otorhinolaryngology, with her MBBS coming from the University of Jordan. Fellowship training in rhinology and endoscopic sinus surgery happened at the University of Bologna in Italy. She speaks Arabic and English fluently. Patients often mention how she listens carefully and explains things in a reassuring way during visits.
Her clinical work covers endoscopic sinus surgery, rhinoplasty, otoplasty for prominent ears, pediatric ENT cases, nasal obstruction and allergy management, tonsillectomy, adenoidectomy, voice disorders, throat issues, and various hearing and ear conditions. Sleep disorders fall within her scope too. It’s the kind of broad experience that comes from years focused on advanced ENT treatments.
Key Highlights:
European Board certified in otorhinolaryngology
Fellowship in rhinology and endoscopic sinus surgery Bologna Italy
Dr. Shahram Sajjadi focuses on rhinoplasty in Dubai, where he introduced ultrasonic (Piezo) rhinoplasty in the UAE back in 2014. This method uses precise bone contouring without traditional breaking, which cuts down on bruising and swelling. He handles both cosmetic and reconstructive cases, aiming for natural, balanced results that fit the face. Experience covers a range of adjustments like hump reduction, tip work, dorsal changes, septum corrections for breathing, width narrowing, and revisions sometimes using rib cartilage. He tailors plans to each person’s features and goals, with surgery usually lasting around two hours under general anesthesia. Recovery sees many back to work in a week, though full settling takes a year or more.
Open approaches involve minimal columella scarring that fades over time. About half the patients show little to no swelling by day seven with the ultrasonic technique. He combines aesthetic goals with functional improvements like septoplasty when needed. It all depends on what someone is hoping to fix – breathing, shape, or both.
Key Highlights:
Introduced Piezo ultrasonic rhinoplasty in UAE 2014
Specializes in natural harmonious outcomes
Experience in ethnic and male rhinoplasty
Focus on minimal bruising and swelling
Services:
Ultrasonic rhinoplasty
Cosmetic rhinoplasty
Reconstructive rhinoplasty
Revision rhinoplasty
Septoplasty
Ethnic rhinoplasty
Contact Information:
Website: drshahramsajjadi.com
Phone: +971 585 552 622
Address: Unit 101, 1st Floor, Building 72 Dubai Healthcare City Umm Hurair 2nd, Oud Metha Road, Dubai, United Arab Emirates
Dr. Adnan Tahir is a UK-trained plastic surgeon practicing in Dubai for the past 11 years. He started in plastic surgery back in 2003 after MRCS from the Royal College of Surgeons, followed by national training leading to FRCS (Plast) in 2012 and specialist registration with the GMC. Full-time aesthetic work as a consultant spans 15 years now. A fellowship in aesthetic surgery took place in Rotterdam, Netherlands, and he holds an MSc in tissue engineering from University College London. Publications appear in peer-reviewed journals, with presentations at various meetings over the years. Membership stands in six major medical societies. He listens carefully during consultations and pushes for minimal intervention to get natural, proportionate looks.
Beyond rhinoplasty, background includes reconstructive areas like burns, hand surgery, trauma, cancer work, and congenital cases. In Dubai he handles cosmetic procedures with an eye on patient education and realistic expectations. Many clients mention how he takes time to explain everything step by step.
Dr. Aiham Alshawwa works as an ENT consultant in Dubai with German board certification. He started his medical training in Syria at Damascus University back in 1999, then moved to Germany where he earned his medical license and specialist qualifications. Experience includes positions as an ENT resident at university hospitals in Marburg and Jena, followed by roles as specialist and consultant at clinics like Helios, Elbland (an academic teaching hospital of Dresden University), Acqua Clinic in Leipzig, and most recently the Albertus Centre in Mönchengladbach before coming to the UAE. He speaks Arabic, English, and German fluently. Many patients appreciate his thorough approach during consultations – it helps build trust right from the start.
His surgical focus covers a wide range of ENT procedures, from functional rhinoplasty and advanced endoscopic sinus surgery to laser work on the larynx, septoplasty revisions, snoring operations, and ear procedures like tympanomastoid surgery. He also handles neck lumps, salivary gland tumors, and facial skin lesions including reconstructions. It’s clear he draws on years of hands-on work in Germany for these cases.
Key Highlights:
German board certified ENT specialist
Extensive training at university hospitals in Marburg and Jena
Consultant roles at Helios, Elbland, and Acqua Clinic Germany
Dr. Seejo George specializes in ENT surgery with a strong emphasis on rhinoplasty and facial rejuvenation in Dubai and Sharjah. He has built a reputation among patients, particularly in the Indian community, for delivering natural-looking nose reshaping results. His clinic handles a full range of ENT concerns alongside cosmetic procedures. He incorporates advanced tools like 3D imaging during consultations to help patients visualize plans. Research and conference participation keep him updated, and he often blends in holistic methods to ease recovery.
Patients frequently mention the personalized attention they receive – multiple pre-op meetings are common to address every question. His practice covers sinus treatments, ear surgeries, and more everyday issues like wax removal or throat care. It all comes down to what each person needs functionally and aesthetically.
Dr. Bashar Bizrah works at Bizrahmed in Dubai with a long history in facial plastic surgery. He has carried out over 40,000 rhinoplasty procedures across patients from varied ethnic backgrounds. Experience also covers thousands of facelifts and blepharoplasties for European and non-European cases. He authored a textbook on rhinoplasty and facial plastic surgery that’s recognized in the UK, America, and Europe. Certification comes from the Royal College of Surgeons of England in rhinoplasty, facial plastic surgery, and blepharoplasty. Membership includes the American Society of Plastic Surgeons and the American Academy of Facial Plastic and Reconstructive Surgery. He lectures and contributes to courses and conferences on facial plastic surgery globally.
Procedures at the clinic often happen under local anesthesia, with a plaster or cast removed after about a week and normal activities resuming in around 10 days. Follow-up continues free for 12 months post-surgery. He has background in UK-based rhinoplasty using techniques like rib grafts for diverse patients from regions including the Middle East, India, Africa, and China. It’s not uncommon for people to choose him specifically for revision work or ethnic rhinoplasty cases.
Key Highlights:
Over 40,000 rhinoplasty procedures
Textbook author on rhinoplasty and facial plastic surgery
Royal College of Surgeons certification England
Member AAFPRS and American Society of Plastic Surgeons
Address: Al Sarraf Avenue, 2nd Floor, Um Al Sheif, Dubai
LinkedIn: www.linkedin.com/company/bizrahmed
Facebook: www.facebook.com/BizrahMed
Instagram: www.instagram.com/bizrahmed
11. Dr. Omar Ayoub
Dr. Omar Ayoub is a UK-trained ENT consultant and rhinologist with a special license from the Royal College of Surgeons of England for cosmetic nasal surgery. He qualified from the University of Cairo in 1988 and built experience through training and fellowships in Alexandria, Pennsylvania, and Bristol. Work spans prestigious hospitals in the UK like University Hospital Aintree and Southport & Ormskirk NHS Trust, plus time at Mediclinic Parkview in Dubai. He stays involved in teaching as an examiner for the Royal College of Surgeons of Edinburgh and organizes the Liverpool Rhinoplasty Course since 2018.
His special interests include functional and cosmetic rhinoplasty, septoplasty, turbinoplasty, endoscopic sinus procedures, and various ear surgeries. Memberships cover the British Rhinological Society, European Academy of Facial Plastic Surgery, and others. Patients often comment on his balanced approach to both breathing improvements and appearance changes.
Key Highlights:
Over 30 years ENT experience
Special cosmetic nasal surgery license Royal College Surgeons England
Dr. Habeeb Al Bitar works as an ENT specialist in Dubai across places like Medcare Hospital, Al Moosa Day Surgery Center, and Emirates Hospital Jumeirah. He holds a Master in otolaryngology from Damascus University, plus Arab Board and Syrian Board certifications in ENT, along with an MD in general medicine from Damascus. Membership includes the Syrian Association of Otolaryngology Head and Neck Surgery, ENT Association in Dubai, and the Middle East Academy of Otolaryngology Head and Neck. His approach often involves non-surgical options where possible.
He focuses heavily on nose and sinus issues, using laser techniques for allergies, turbinate reduction, and snoring without traditional surgery. Endoscopic methods come in for advanced cases. Rhinoplasty uses an advanced technique for reshaping with attention to breathing function.
Key Highlights:
Arab Board and Syrian Board in ENT
Master in otolaryngology Damascus University
Experience at Medcare Al Moosa and Emirates Hospital Dubai
Dr. Kianoosh Nahid works as a specialist ENT with a focus on rhinoplasty, currently seeing patients as a visiting doctor in Dubai CBD at Saudi German Hospital. He graduated as a board-certified ENT specialist from Malaysia and speaks English, Persian, Arabic, and Turkish. Before shifting to medicine he spent time practicing and teaching sculpture and statue-making, which he says helps blend artistic sense with surgical precision for nasal work. He’s also a licensed civil pilot who flies light airplanes as a side passion.
His main areas stay centered on primary rhinoplasty, revision rhinoplasty, and blepharoplasty for eyelids. Many who look into his profile note how the artistic background comes through in discussions about achieving balanced, functional noses. It adds an interesting layer to how he approaches each case.
Address: Hessa Street 331 West, Al Barsha 3, Exit 36 Sheikh Zayed Rd opposite of American School Dubai
14. Dr. Hatem Dalati
Dr. Hatem Dalati serves as medical director and ENT consultant at the ENT Clinic of Excellence in Dubai. He carries European Board and Arab Board certifications in ENT along with a specialized fellowship in rhinoplasty. Experience spans more than 15 years handling both aesthetic and revision rhinoplasty cases. He often combines cosmetic nasal reshaping with functional corrections for issues like obstruction or sinus problems in the same procedure. Background includes medical leadership roles plus involvement in research and education.
His approach prioritizes natural balanced outcomes using current techniques for both appearance and breathing improvements. Patients frequently mention the thorough way he addresses combined aesthetic and functional needs during consultations. It really comes down to what someone wants to change – looks, airflow, or usually a bit of both.
Key Highlights:
European Board and Arab Board ENT certifications
Specialized rhinoplasty fellowship
Medical director ENT Clinic of Excellence
Experience aesthetic and revision rhinoplasty
Focus functional nasal corrections
Services:
Aesthetic rhinoplasty
Revision rhinoplasty
Functional rhinoplasty
Sinus treatments
Nasal obstruction management
Contact Information:
Website: entclinic.ae/dr-hatem-dalati
Phone: 971502480249
Email: info@entclinic.ae.com
Address: Second, Building 64 Block A 2nd floor 2004 -Umm Hurair Second – Dubai Healthcare City Dubai
Instagram: www.instagram.com/entclinicae
15. Dr. Anshu Mishra
Dr. Anshu Mishra works as a plastic surgeon in Dubai with more than 11 years of clinical experience in cosmetic and reconstructive procedures. She trained at Army Hospital Research and Referral in New Delhi earning a gold medal from the National Board of Examinations in Plastic Surgery. Fellowship training covers aesthetic gynecology and she holds a diploma in aesthetic medicine from the American Association of Continuing Medical Education plus a certificate in facial trauma management from AOCMF in Switzerland. Membership includes the International Society of Aesthetic Plastic Surgery and the American Society of Plastic Surgeons. She attends international and local conferences regularly to stay current with techniques.
Her services include rhinoplasty tummy tuck gynecomastia surgery liposuction mommy makeover breast augmentation lift vaser liposuction. Consultations tend to run longer as she explains options thoroughly and focuses on realistic expectations. Patients often mention feeling comfortable discussing concerns openly.
Key Highlights:
Gold medal National Board Examinations Plastic Surgery
Wrapping this up, picking the right nose surgeon in Dubai really comes down to a few practical things that go beyond flashy websites or big promises. Look for someone whose experience lines up with exactly what you need – whether that’s a subtle tweak for better breathing, a full reshape that fits your face naturally, or fixing something from a previous surgery that didn’t go as planned. Credentials matter, sure, but so does how comfortable you feel during the consultation. If the surgeon takes time to listen, shows realistic before-and-afters from similar cases, and talks openly about risks and recovery without rushing you into anything, that’s usually a solid sign.
Dubai has plenty of skilled options, and the standards here are high because of the international mix of patients and regulations. Still, do your homework – read recent independent reviews, ask about follow-up care, and trust your gut if something feels off. A good rhinoplasty isn’t just about the result on day one; it’s about how it settles and feels years later. Take your time with it. When it clicks with the right person, the whole process tends to feel a lot less stressful and the outcome more worth it. Good luck out there.
Dubai has emerged as a top global hub for rhinoplasty, attracting patients worldwide thanks to its exceptional board-certified surgeons and advanced facilities. What truly sets the city apart is the high level of its leading rhinoplasty specialists- internationally trained ENT and facial plastic surgeons with extensive experience in aesthetic, functional, and revision nose jobs. These top surgeons deliver natural, harmonious results using modern techniques like preservation rhinoplasty, closed (scarless) methods, and ultrasonic approaches. They focus on facial balance, ethnicity, and personal goals-whether subtle refinement or fixing breathing issues. In the end, the best choice comes down to finding a surgeon whose expertise, artistry, and track record align perfectly with your vision-for confident, authentic results.
1. Dr Levente Deak
Dr Levente Deak holds an MD PhD and maintains licenses from the GMC in the UK along with DHA and DHCC in the UAE. He works as a dual board-certified ENT surgeon and facial plastic surgeon, with more than 15 years in the field after completing fellowships at Northwestern University in Chicago for ENT and in Bergamo, Italy, for rhinoplasty. During those training periods he earned the Spoendlin and Bekesy awards for research, and he continues to publish papers in international journals – up to around 15 each year. He sees patients daily at Cosmosurge in Dubai, where the focus stays on nasal issues that balance appearance and breathing function.
Patients often mention his regular attendance at international congresses to keep current with surgical developments, and he shares knowledge through training sessions for younger ENT specialists plus speaking invitations at conferences. The practice emphasizes detailed planning so outcomes align with individual facial features and needs. Many reviews highlight consistent five-star feedback from those who’ve gone through the process.
Key Highlights:
Dual board certification in ENT and facial plastic surgery
Fellowships in Chicago and Bergamo
Annual publications in scientific journals
Training programs for ENT doctors
Daily consultations at Cosmosurge Dubai
Services:
Rhinoplasty for aesthetic and functional corrections
Dr Bashar Bizrah has built experience with a high volume of rhinoplasty cases across different ethnic groups, along with thousands of facelifts and blepharoplasties. He authored a textbook covering rhinoplasty and facial plastic surgery, which gained recognition from academies in the UK, US, and Europe. Certifications come from the Royal College of Surgeons of England in rhinoplasty, facial plastic surgery, and blepharoplasty. Memberships include the American Society of Plastic Surgeons and the American Academy of Facial Plastic and Reconstructive Surgery.
He lectures and contributes to courses on facial plastic surgery at various global events. Much of his earlier rhinoplasty work happened in the UK, handling patients from regions like Europe, the Middle East, India, Africa, and China – sometimes incorporating rib grafts when needed. The clinic provides options depending on the extent of change required and patient anatomy.
Key Highlights:
High number of rhinoplasty procedures completed
Textbook author on rhinoplasty and facial plastic surgery
Address: Al Sarraf Avenue, 2nd Floor, Um Al Sheif, Dubai
LinkedIn: www.linkedin.com/company/bizrahmed
Facebook: www.facebook.com/BizrahMed
Instagram: www.instagram.com/bizrahmed
3. Dr Shahram Sajjadi
Dr Shahram Sajjadi focuses on rhinoplasty with an emphasis on ultrasonic Piezo technology, which he started using routinely in the UAE back in 2014. This approach allows precise bone work without traditional breaking methods, often leading to less bruising and swelling while protecting surrounding tissues. He handles both cosmetic adjustments – like humps, tip work, width changes – and functional ones such as septoplasty for deviated septums or breathing problems. Revision cases draw on cartilage from septum, ear, or rib sources when extra support is required.
Consultations involve evaluations, photos, and computer simulations to map out possibilities. Post-op instructions cover everything from cold compresses and taping to activity restrictions and sun protection during recovery. Many patients note the personalized plans that consider facial harmony, ethnic features, or maintaining masculine traits where relevant.
Key Highlights:
Routine use of Piezo ultrasonic rhinoplasty since 2014
Experience in primary, revision, and ethnic rhinoplasty
Functional corrections including septoplasty
Cartilage grafting techniques from multiple donor sites
Focus on minimal downtime with advanced tools
Services:
Ultrasonic rhinoplasty
Open rhinoplasty
Revision rhinoplasty
Ethnic rhinoplasty
Male rhinoplasty
Septoplasty
Contact Information:
Website: drshahramsajjadi.com
Phone: +971 585 552 622
Address: Unit 101, 1st Floor, Building 72 Dubai Healthcare City Umm Hurair 2nd, Oud Metha Road, Dubai, United Arab Emirates
Dr Adnan Tahir completed UK training with MRCS from the Royal College of Surgeons, followed by specialist plastic surgery training leading to FRCS (Plast) in 2012 and CCT entry on the GMC specialist register. He pursued a fellowship in aesthetic surgery in Rotterdam, Netherlands, and earned an MSc in tissue engineering from University College London. For the last 15 years he has concentrated on aesthetic procedures full-time as a consultant, with the past 11 years based in Dubai at places like CosmeSurge Hospital.
He has published articles in peer-reviewed journals and presented at national and international meetings over the years. Active involvement continues in several medical societies. Consultations tend to involve listening closely to what patients want, explaining options, and aiming for subtle, proportionate changes rather than dramatic shifts.
Assistant Professor Dr. Aiham Alshawwa holds German board certification as an ENT specialist and consultant, with a medical degree from Damascus University back in 1999 followed by training and roles in various German university hospitals like Marburg, Jena, Helios Clinic, Elbland Clinic, and Acqua Clinic. He gained his ENT specialist accreditation in Thringen and later consultant status at an academic hospital tied to Dresden University, building hands-on work in Germany before moving to Dubai. Spoken languages include Arabic, English, and German, and he holds a DHA license as Consultant Ear, Nose & Throat Surgeon while working full-time at American Hospital Dubai and the Dubai Media City Clinic.
Procedures cover a range from septoplasty and functional rhinoplasty to endoscopic sinus surgery, laser treatments for the larynx, snoring operations, and complicated nasal septum revisions. Many cases involve balancing form and function in nasal work, alongside ear surgeries like tympanoplasty or grommets insertion. Patients coming in often go through thorough evaluations for issues like sinus problems or snoring that tie into nasal structure.
Key Highlights:
German ENT specialist and consultant certifications
Dr Seejo George works as an ENT specialist with a focus on rhinoplasty and related facial procedures, holding qualifications from Indian medical colleges including JSS and Calicut, plus a fellowship in aesthetic rhinoplasty at the University of Amsterdam under notable mentors. He practices at several JCI-accredited hospitals in Dubai like International Modern Hospital and Dubai London Hospital, as well as locations in Sharjah such as Medcare. Research contributions appear through conference participation, journal publications, and book chapters, often incorporating holistic methods to support recovery.
Consultations for rhinoplasty involve 3D imaging to discuss plans clearly, with multiple pre-op meetings to cover expectations and details. Procedures extend to sinus treatments, nasal polyp surgery, ear wax or foreign body removal, and other ENT concerns like endoscopic approaches for tear duct issues. Many who visit appreciate the step-by-step communication that helps build comfort before any surgery.
Key Highlights:
Fellowship in aesthetic rhinoplasty from Amsterdam
Practice at JCI-accredited hospitals in Dubai and Sharjah
Dr Omar Ayoub graduated from the University of Cairo in 1988 and pursued extensive training with fellowships at universities in Alexandria, Pennsylvania, and Bristol, developing skills in rhinology, rhinoplasty, and facial plastic surgery. The Royal College of Surgeons of England granted him a specific license for cosmetic nasal surgery, and he has built over 30 years in the specialty across the UK and UAE at places like University Hospital Aintree, Southport & Ormskirk NHS Trust, and Mediclinic Parkview Hospital in Dubai. Academic involvement continues through examining at the Royal College of Surgeons of Edinburgh, teaching aesthetic professional behavior courses in England, and organizing the Liverpool Rhinoplasty Course since 2018.
Memberships span the British Medical Association, British Rhinological Society, European Academy of Facial Plastic Surgery, and others. Special interests center on functional and cosmetic rhinoplasty alongside septoplasty, turbinoplasty, endoscopic sinus procedures, and various ear surgeries like tympanoplasty or cholesteatoma removal. He balances nasal aesthetics with breathing improvements in many cases.
Key Highlights:
Over 30 years of ENT and rhinology experience
Special cosmetic nasal surgery license from Royal College of England
Dr Dima Ghaith serves as a consultant ENT at Emirates Specialty Hospital in Dubai Healthcare City, holding certifications from both the Arab and European Boards in otorhinolaryngology. She completed her MBBS at the University of Jordan, followed by a fellowship in rhinology and endoscopic sinus surgery at the University of Bologna in Italy. With more than 17 years in the field, her practice covers a mix of ear, nose, and throat conditions, often blending surgical precision with a focus on patient comfort during consultations.
Many who see her mention how she listens closely and explains things clearly, which helps ease concerns especially around nasal procedures or breathing issues. The approach stays patient-centered, drawing on international training to handle cases from common allergies to more involved corrections. Reviews tend to highlight that reassuring manner during visits.
Key Highlights:
Arab and European Board certifications in ENT
Fellowship in rhinology and endoscopic sinus surgery in Italy
MBBS from University of Jordan
Practice at Emirates Specialty Hospital Dubai Healthcare City
Dr Dirk Kremer runs his practice through Perfect Doctors Clinic, focusing on cosmetic surgery with an emphasis on personal continuity from first meeting to final follow-up. Training started in Munich, Germany, then moved to New York and San Diego for further studies, before postgraduate work at a major teaching hospital in Munich leading to board certification in 2003. Later periods in Los Angeles helped refine specific techniques, and since 2013 he has been based in Dubai performing procedures for patients from various countries.
The philosophy centers on empathy, technical skill, and aiming for natural-looking changes rather than anything exaggerated. He encourages people to consult a few surgeons to find the right fit. Patients often travel specifically for his methods, which he developed through ongoing learning from surgeons around the world.
Key Highlights:
Board certification in plastic and reconstructive surgery from Germany
Training in Munich, New York, San Diego, Los Angeles
Practice in Dubai since 2013
Focus on artistic vision combined with technical precision
Volunteer work in Asia and Africa
Services:
Rhinoplasty
Various facial cosmetic procedures
Body contouring options
Breast surgeries
Reconstructive techniques
Contact Information:
Website: www.perfectdrs.com/doctors/doctor-1
Phone: +971 56 191 7976
Email: concierge@perfectdrs.com
Address: Villa 888 Al Wasl Rd – Jumeirah – Umm Suqeim 1 – Dubai – United Arab Emirates
Facebook: www.facebook.com/PerfectDoctorsClinic
Instagram: www.instagram.com/perfectdoctorsclinic
10. Dr Habeeb Al Bitar
Dr Habeeb Al Bitar holds a master’s in otolaryngology from Damascus University along with Arab and Syrian board certifications in ENT, plus an MD in general medicine from the same institution. He has worked as an ENT specialist at Medcare Hospital, Al Moosa Day Surgery Center, and Emirates Hospital in Jumeirah, all in Dubai. Memberships include the Syrian Association of Otolaryngology Head and Neck Surgery, the ENT Association in Dubai, and the Middle East Academy of Otolaryngology Head and Neck.
His consultations cover full assessments for ENT issues, with particular attention to nasal and sinus concerns using both non-surgical laser approaches and endoscopic methods when needed. Many cases involve addressing breathing difficulties, allergies, or snoring without traditional incisions. Advanced rhinoplasty techniques come into play for reshaping while tackling functional problems at the same time.
Key Highlights:
Master’s and boards in otolaryngology from Damascus and Arab/Syrian certifications
Experience at Medcare, Al Moosa, and Emirates Hospital Dubai
Membership in regional and local ENT associations
Use of laser techniques for nasal and snoring issues
Dr Kianoosh Nahid works as a board-certified ENT specialist with a focus on rhinoplasty and revision rhinoplasty, having graduated from medical school in Malaysia. He also performs blepharoplasty alongside nasal procedures that address both cosmetic shape and functional breathing concerns. Before entering surgery he spent time practicing and teaching sculpture and statue-making, which he draws on to blend artistic elements with medical technique during operations.
Languages spoken include English, Persian, Arabic, and Turkish, and he sees patients as a visiting doctor in Dubai’s CBD area at Saudi German Hospital. Outside of work he holds a license as a civil pilot for flying light airplanes. Consultations tend to cover detailed planning for nasal adjustments that aim to suit individual facial features.
Address: Hessa Street 331 West, Al Barsha 3, Exit 36 Sheikh Zayed Rd opposite of American School Dubai
12. Dr Ankit Kothari
Dr Ankit Kothari practices as a specialist in plastic and aesthetic surgery at Aster Cedars Hospital & Clinic in Jebel Ali, with qualifications including MCh and DrNB in plastic surgery plus MRCS from Edinburgh. Fellowships come from ISAPS and IAAPS, and training involved work with surgeons in Brazil, India, and the UAE. He handles a range of cosmetic and reconstructive procedures, often combining precision with customized plans based on patient needs.
Experience spans body contouring, facial surgeries, breast work, and non-surgical options like Botox or fillers, alongside reconstructive cases from trauma, burns, or complex wounds. Many consultations emphasize safety and natural outcomes through detailed discussions. He speaks English, Hindi, and Gujarati while based in Dubai.
Address: 33rd Floor, Aspect Towers, Business Bay, Dubai, UAE
LinkedIn: www.linkedin.com/company/asterhospitals
Facebook: www.facebook.com/AsterHospitalsUAE
Twitter: x.com/aster_hospital
Instagram: www.instagram.com/aster_hospital
13. Dr Shim Ching
Dr Shim Ching holds dual board certification from the American Board of Plastic Surgery and the Canadian Board of Plastic Surgery after completing his medical degree in Canada through McGill University and the University of British Columbia. Advanced training followed at institutions in Brazil, Switzerland, and the United States, shaping his approach to various cosmetic procedures. He practices at Quttainah Specialized Hospital in Dubai while maintaining a base in Honolulu, Hawaii, and focuses on surgical and non-surgical options that aim for natural-looking adjustments.
Rhinoplasty appears among his regular procedures, often paired with attention to facial balance through things like chin augmentation when needed. He has built experience with Asian aesthetic surgery, adjusting techniques to suit specific facial structures and preferences in that group. Memberships in organizations such as the American Society for Aesthetic Plastic Surgery, International Society of Aesthetic Plastic Surgery, and Canadian Society of Plastic Surgeons keep him connected to ongoing developments in the field.
Key Highlights:
Dual board certification American and Canadian
Training in Brazil, Switzerland, United States
Specialization in Asian aesthetic surgery
Practice at Quttainah Specialized Hospital Dubai
Membership in multiple aesthetic plastic surgery societies
Dr Anshu Mishra completed her plastic surgery training at Army Hospital Research and Referral in New Delhi, earning a Gold Medal from the National Board of Examinations for her clinical skills. She holds memberships in ISAPS and ASPS, plus a fellowship in aesthetic gynecology and a diploma in aesthetic medicine from the American Association of Continuing Medical Education. Additional certification covers management of facial trauma from AOCMF in Switzerland, and she stays current by attending international and local conferences on plastic surgery advancements.
Her practice includes a range of cosmetic and reconstructive procedures, with consultations that prioritize patient safety, clear explanations, and realistic outcome discussions. Many women appreciate the private, empathetic setting where concerns get addressed thoroughly. She focuses on subtle enhancements that align with individual body types and lifestyles rather than uniform changes.
Dr Hatem Dalati serves as medical director and ENT consultant at the ENT Clinic of Excellence, holding European Board and Arab Board certifications along with a specialized rhinoplasty fellowship. Experience spans aesthetic rhinoplasty, revision cases, and functional corrections for issues like nasal obstruction or sinus problems. He often combines cosmetic reshaping with breathing improvements in single procedures using current techniques.
The approach focuses on achieving balanced, harmonious nasal outcomes that consider individual facial features. Background includes medical leadership roles plus involvement in research and education within ENT and rhinoplasty fields. Patients typically go through detailed consultations to align expectations with realistic possibilities.
Key Highlights:
European Board and Arab Board in ENT
Specialized rhinoplasty fellowship
Medical director at ENT Clinic of Excellence
Experience in aesthetic and revision rhinoplasty
Focus on combined functional and cosmetic nasal procedures
Services:
Aesthetic rhinoplasty
Revision rhinoplasty
Functional nasal corrections
Sinus problem treatments
Nasal obstruction management
Contact Information:
Website: entclinic.ae/dr-hatem-dalati
Phone: 971502480249
Email: info@entclinic.ae
Address: Second, Building 64 Block A 2nd floor 2004 -Umm Hurair Second – Dubai Healthcare City Dubai
Instagram: www.instagram.com/entclinicae
Conclusion
Picking the right surgeon for a rhinoplasty in Dubai can feel a bit overwhelming at first – all those profiles, techniques, and credentials stacking up like a puzzle you didn’t know you had to solve. But here’s the thing: it’s not about chasing some magic “best” label that fits everyone; it really boils down to matching your own nose woes (whether it’s a bump that’s bugged you forever, breathing that’s never quite right, or just wanting subtle harmony with your face) to someone whose background clicks with that. From what stands out across these options, folks doing solid work here often blend ENT know-how with plastic surgery finesse – think dual boards, fellowships from places like Europe or the US, and a knack for both fixing function and tweaking aesthetics without going overboard.
Many patients chatting in reviews (yeah, I dug into those forums and clinic feedback spots) swear by surgeons who spend real time on consults – showing simulations, talking ethnic features or revision headaches, and setting realistic recovery vibes. Dubai’s scene shines because of that medical tourism polish: quick heals, luxe clinics, English everywhere – but don’t skip your homework. Chat with a few, ask about their revision rates or scarless methods like closed approaches, and trust your gut on who makes the whole thing feel straightforward. End of the day, a great nose job isn’t just surgery; it’s the confidence boost that sneaks up when you catch your reflection and think, “Huh, that actually works.” If you’re eyeing this, start with a virtual consult – Dubai’s pros make it easy, and you’ll sleep better knowing it’s your call.
Finding the right ENT surgeon in Dubai often comes down to trust. When you’re dealing with chronic sinus issues, hearing problems, throat pain, or voice concerns, you want someone who doesn’t just rely on credentials, but on real-world experience and good clinical judgment.
Dubai has quietly become a strong hub for ENT care, bringing together surgeons trained across Europe, the UK, and the Middle East. Many of them work at internationally accredited hospitals and see a wide mix of complex and everyday cases. Some are known for advanced sinus and nasal surgeries, others for pediatric ENT, hearing restoration, or voice disorders.
In the sections ahead, we’ll walk through a carefully curated group of ENT surgeons in Dubai who are widely respected in their field, not because of marketing claims, but due to consistent patient outcomes, peer recognition, and years spent doing the work day in and day out.
1. Dr. Muddazir Ali Ibrahim
Dr. Muddazir Ali Ibrahim has built his ENT practice around hands-on surgical work and day-to-day clinical problem solving. He is known for spending a large part of his time on endoscopic and microscopic procedures, particularly where precision matters more than speed. His background includes training linked to the British Royal College, which shows through in how structured his clinical approach tends to be.
Working with patients in Dubai over many years, he sees a wide mix of routine ENT concerns and more technical surgical cases. Much of his work focuses on conditions that affect hearing, breathing, and voice quality, often using minimally invasive techniques rather than open surgery when possible.
Key Highlights:
ENT clinical experience
British Royal College certified
Regular use of endoscopic and microscopic techniques
Multilingual communication with patients
Services:
Pediatric ENT procedures
Micro ear surgery
Sinus surgery
Endoscopic septoplasty
Endoscopic ear surgery
Micro laryngeal surgery
Contact Information:
Website: www.drmuddazir.com
Email: muddu79@gmail.com
Facebook: www.facebook.com/muddazirali.ibrahim
Twitter: x.com/DrMuddazir60574
Instagram: www.instagram.com/drmuddazir
Address: NMC Specialty Hospital, Al Nahda 2, Dubai
Phone: +971 58 1270 700
2. Dr. Muhammad Jabbr
Dr. Muhammad Jabbr has a long-standing career that blends surgical practice with academic involvement. His work often extends beyond routine ENT care into head and neck surgery, where careful diagnosis and planning are critical. Over the years, he has handled a large number of surgical cases across different ENT subspecialties.
Based in Dubai, he is also active in professional education and research, contributing to conferences and medical publications. This academic background influences how he approaches complex cases, especially those involving tumors, chronic sinus disease, or airway-related conditions.
Address: Medcare Hospital – Park Gate No:1 – Al Hadiqa Rd – Opposite Al safa – Al Safa 1 – Al Safa – Dubai – United Arab Emirates
Phone: +971 52 751 7811
3. Dr. Mustafa Kapadia
Dr. Mustafa Kapadia focuses much of his clinical work on ear and sinus disorders, with a strong emphasis on endoscopic techniques. A significant portion of his surgical procedures are performed through the ear canal, avoiding external incisions when possible. This technical focus has shaped his reputation among patients who require detailed ear-related interventions.
In Dubai, his work is closely tied to ongoing research and teaching within the ENT field. He is involved in professional organizations related to endoscopic ear surgery and regularly contributes to discussions around newer surgical methods and long-term outcomes.
Address: The Green Community, West Gate Entrance 1, Community East, Dubai Investment Park 1, Dubai, United Arab Emirates
Phone: +971503943297
4. Dr. Vishnu Kumar
Dr. Vishnu Kumar approaches ENT care with a structured, protocol-driven mindset. His clinical work spans outpatient care, surgical cases, and emergency ENT situations, which gives him a broad view of how ENT conditions evolve over time. He has experience with both routine consultations and technically demanding surgeries.
Practicing in Dubai, he regularly manages sinus disorders, ear conditions, and voice-related problems. His background includes work in teaching hospitals, which reflects in how he explains conditions and treatment paths to patients.
Key Highlights:
Board certified ENT specialist
Experience in hospital-based and academic settings
Regular involvement in endoscopic sinus and ear surgery
Address: Aster Clinic, Bur Dubai (AJMC) Near Al Fahidi Metro Station, Khalid Bin Al Waleed Road, Bur Dubai
Phone: +971-585508289
5. Dr. Amit Goel
Dr. Amit Goel’s ENT practice centers on everyday ear, nose, and throat conditions that can significantly affect quality of life if left untreated. His work often involves managing chronic nasal issues, throat conditions, and voice-related concerns, with a steady mix of medical and surgical care.
Based in Dubai, his clinical focus leans toward clear diagnosis and practical treatment planning rather than complex interventions unless they are truly needed. This makes his work particularly relevant for patients dealing with persistent but manageable ENT problems.
Key Highlights:
Focus on common and chronic ENT conditions
Experience with both medical and surgical treatment paths
Regular management of voice and throat disorders
Services:
Ear-related condition management
Nose and sinus care
Adenotonsillar disorder treatment
Voice and speech disorder management
Contact Information:
Website: dramitgoelent.com
Email: marketing@dramitgoelent.com
Address: Medcare Hospital Al Safa, Al Safa 1, Dubai, United Arab Emirates
Phone: +971 55 373 0465
6. Dr. Vivek Sharma
Dr. Vivek Sharma works across a broad range of ENT conditions, combining outpatient care with surgical treatment when required. His practice includes managing ear infections, nasal obstruction, sinus disease, and throat-related complaints that often overlap in daily clinical work.
Practicing in Dubai, his role typically involves long-term patient follow-up, especially for chronic ENT issues that require monitoring rather than one-time intervention. His work reflects a balanced approach between conservative care and surgery.
Address: Al Zahra Hospital, Sheikh Zayed Rd, Al Barsha – Al Barsha 1, Dubai, United Arab Emirates
Phone: +971 4 378 6666
7. Dr. Seejo George
Dr. Seejo George works across general ENT care with a noticeable focus on nasal structure and function. His clinical work often brings together breathing-related concerns and nasal form, which places rhinoplasty and septal correction alongside routine ENT practice. He has spent years handling both functional and aesthetic nasal cases, often relying on preoperative planning tools to guide decisions.
Practicing in Dubai, his work includes treating patients of different age groups, from common sinus complaints to more involved nasal procedures. Much of his approach is centered on understanding airflow issues and structural causes before moving toward surgical intervention.
Key Highlights:
Focus on rhinoplasty and nasal structure
Experience with both surgical and non-surgical procedures
Dr. Peter Baptista has shaped much of his ENT career around sleep-related breathing disorders. His clinical focus connects ENT anatomy with sleep physiology, especially in patients dealing with obstructive sleep apnea. Earlier in his career, he was involved in advanced surgical techniques for airway management, including robotic-assisted procedures.
Now practicing in Dubai, he continues to work with patients whose ENT conditions affect sleep quality, voice, and breathing. His work often involves long-term management plans rather than one-time procedures, particularly for apnea-related conditions.
Key Highlights:
European board certified ENT consultant
Special focus on sleep apnea and airway disorders
Background in robotic and advanced ENT surgery
Active involvement in research and teaching
Services:
Sleep apnea evaluation and management
Diagnostic sleep endoscopy
Septoplasty
Sinus surgery
Tonsil and throat procedures
Turbinate reduction
Contact Information:
Website: entspecialistdubai.com
Email: peterbaptista@rocketmail.com
Instagram: www.instagram.com/17841472700003747
Address: Al Zahra Hospital Dubai, Sheikh Zayed Rd – Al Barsha, Al Barsha 1 – Dubai – United Arab Emirates
Phone: +97143786666
9. Dr. Sanjay Kewalramani
Dr. Sanjay Kewalramani practices across a wide range of ENT conditions, from ear infections and hearing concerns to nasal blockage and throat disorders. His work includes both adult and pediatric cases, with regular involvement in procedures that address chronic ENT problems affecting daily comfort.
Based in Dubai, he is also involved in professional education and community programs related to ENT health. This background often shows in how structured his consultations tend to be, especially for patients dealing with recurring symptoms.
Dr. Rahul Gupta approaches ENT care with an emphasis on diagnosis and step-by-step treatment planning. His clinical work covers both routine consultations and surgical cases, often involving nasal obstruction, throat complaints, and ear-related conditions that require careful evaluation.
Practicing in Dubai, he works with patients across different age groups and frequently manages cases that require minimally invasive intervention. His background includes specialized training in rhinology, which shapes much of his nasal and sinus-related work.
Key Highlights:
Fellowship training in rhinology
Experience with minimally invasive ENT procedures
Manages both routine and complex cases
Treats adults and children
Services:
Sinus and nasal condition management
Septoplasty and turbinate procedures
Ear disorder treatment
Throat and voice-related care
Pediatric ENT services
Contact Information:
Website: drrahulguptaent.com
Email: drrahulguptaent@gmail.com
Address: Canadian Specialist Hospital – Deira – Abu Hail St – Hor Al Anz East – Deira – Dubai – United Arab Emirates
Phone: +971 52 672 0193
11. Dr. Mukesh Kumar Ramani
Dr. Mukesh Kumar Ramani has spent much of his career working with ear-related conditions that require detailed surgical precision. His experience includes middle ear reconstruction and procedures aimed at improving hearing outcomes, alongside broader ENT care.
Working in Dubai, his practice combines outpatient consultations with operating room work, particularly for chronic ear disease and hearing loss. He is also involved with multiple medical centers, which reflects the surgical nature of his clinical focus.
Key Highlights:
Strong focus on ear and hearing-related surgery
Experience with reconstructive middle ear procedures
Involvement in professional medical associations
Services:
Tympanoplasty
Stapedotomy
Mastoid surgery
Myringotomy and grommet insertion
Intratympanic injections
Management of chronic ear infections
Contact Information:
Website: drmukeshramanient.com
Address: Hamsah-A Building – Khalid Bin Al Waleed Rd – near Ansar Gallery – Al Karama – Dubai – United Arab Emirates
Phone: +971-556415022
12. Dr. Muaaz Tarabichi
Dr. Muaaz Tarabichi has spent decades working at the intersection of ear and sinus surgery, with a particular focus on endoscopic techniques. His clinical work has contributed to the development of minimally invasive approaches that are now widely used in ear surgery.
Practicing in Dubai, he continues to manage complex ear and sinus cases, often involving patients who have had long-standing conditions. His work spans both surgical innovation and day-to-day ENT care across age groups.
Key Highlights:
Pioneer in endoscopic ear surgery
American board certified ENT surgeon
Involvement in surgical technique development
Services:
Endoscopic ear surgery
Sinus surgery
Eustachian tube procedures
Hearing loss management
Treatment of vertigo and balance disorders
Tonsil and voice-related care
Contact Information:
Website: drmuaaztarabichi.com
Facebook: www.facebook.com/DrTarabichi
Twitter: x.com/TarabichiDr
Instagram: www.instagram.com/drmuaaztarabichi
Address: 143 Umm Suqeim St – Umm Al Sheif – Dubai
Phone: 04-4131000
Conclusion
Choosing the right ENT surgeon is rarely about titles or claims. It usually comes down to how well someone listens, explains, and handles the problem in front of them. As this list shows, ENT care in Dubai covers a wide spectrum – from sinus and nasal surgery to complex ear procedures, sleep-related disorders, and pediatric cases. Each surgeon brings a different focus, shaped by years of training and the kind of cases they see every day.
What matters most is that patients have access to specialists who understand both routine complaints and more complicated conditions, and who can move between conservative treatment and surgery when needed. Dubai’s ENT landscape reflects that balance well. With so many experienced surgeons working across hospitals and clinics, patients are not limited to a single approach or specialty. Instead, they can find care that fits their condition, their comfort level, and their long-term needs.
Back pain has a way of quietly taking over your life. One day it’s a mild ache, the next it’s dictating how you sleep, work, or even sit through a coffee with friends. In a city like Dubai, where world-class healthcare meets cutting-edge technology, patients have access to some truly exceptional spine surgeons.
This article focuses on the best spine surgeons in Dubai, doctors who are widely respected for their skill, experience, and outcomes. These are specialists who routinely handle complex spinal conditions, from slipped discs and spinal stenosis to deformities and minimally invasive spine surgery. Many of them work at leading hospitals, treat international patients, and stay at the forefront of modern spinal care.
Rather than explaining how to choose a surgeon, the goal here is simple: to give you clear, helpful context around the top spine surgeons practicing in Dubai today, so you know who stands out and why, before making one of the most important health decisions of your life.
1. Dr. Mehandi Hassan Ansari
Dr. Mehandi Hassan Ansari focuses on spine-related disorders with an emphasis on understanding the underlying anatomy and mechanics of spinal pain. His work centers on diagnosis, patient education, and long-term management of back and neck conditions that may affect daily function. Much of his clinical perspective is built around explaining spinal conditions clearly and helping patients understand their options.
His work is connected to spine care in Dubai, where he sees patients with a wide range of spinal complaints, from simple mechanical pain to more complex spinal diseases. He often addresses issues related to posture, spinal balance, and nerve involvement, particularly when symptoms become persistent or disruptive.
Address: Airport Rd – next to Le Meridian Hotel – Al Garhoud – Dubai – United Arab Emirates
Phone: +971 4 2929777
2. Dr. Basil Al Sharef
Dr. Basil Al Sharef works primarily with complex spinal conditions that require surgical intervention. His clinical background includes training and practice across Germany, Switzerland, and the UAE, with a strong focus on advanced spine and scoliosis surgery. His work typically involves cases that go beyond routine disc problems, including deformities, instability, and revision surgeries.
Now practicing in Dubai, his surgical scope covers the full spine, from cervical to lumbar regions. He is often involved in planning multi-level procedures and addressing conditions where previous treatments have not worked as expected. His role also includes ongoing evaluation of surgical techniques used for spinal reconstruction and alignment.
Key Highlights:
German and Swiss board-certified spine surgeon
Experience with complex and revision spine cases
Surgical focus across cervical, thoracic, and lumbar spine
Background in scoliosis correction
Services:
Cervical spine surgery
Thoracic spine surgery
Lumbar spine surgery
Scoliosis correction
Revision spine procedures
Contact Information:
Website: www.alsharefspine.com
Facebook: www.facebook.com/alsharefspine
Instagram: www.instagram.com/alsharefspine
Phone: 055 889 219
3. Dr. Abdul Karim Msaddi
Dr. Abdul Karim Msaddi has a long-standing career in neurosurgery and spine surgery, with decades of experience managing both neurological and structural spine conditions. His work covers a broad range of spinal disorders, including degenerative diseases, nerve compression, and spinal instability. Alongside clinical practice, he has been actively involved in education and professional training within the spine surgery field.
Practicing in Dubai, he combines surgical decision-making with minimally invasive techniques when appropriate. His clinical interest extends to improving treatment standards and sharing knowledge through conferences and teaching, which reflects in his structured and methodical approach to patient care.
Key Highlights:
Background in neurosurgery and spine surgery
Experience with minimally invasive spine techniques
Active involvement in spine education and training
Work across surgical and non-surgical pathways
Services:
Minimally invasive spine surgery
Percutaneous spine techniques
Disc replacement procedures
ACDF and corpectomy procedures
Management of complex spinal disorders
Contact Information:
Website: www.akmsaddi.com
Email: info@akmsaddi.com
Twitter: x.com/professor_akm
Instagram: www.instagram.com/prof_msaddi
Address: Dubai Hills, Alkhail Road, Marabea’ East Exit, Dubai, UAE
Phone: +971 54 888 3757
4. Dr. Manish Raj
Dr. Manish Raj specializes in advanced spine surgery and interventional spine care, with a strong clinical focus on minimally invasive and endoscopic spine procedures. His work centers on precise diagnosis of spinal and nerve-related conditions and their treatment through targeted surgical and image-guided interventions.
Based in Dubai, he treats a wide range of spinal disorders, particularly complex and chronic cases where conventional treatments have been ineffective. His expertise extends to managing nerve compression, degenerative spine conditions, and persistent post-surgical spine pain, using modern, minimally invasive techniques that support faster recovery and reduced downtime.
Key Highlights:
Specialization in spine surgery and interventional spine care
Extensive experience with endoscopic spine procedures
Treatment of chronic spine and nerve-related pain
Integrated, multidisciplinary approach to complex spine conditions
Address: Burjeel Hospital, Sheikh Zayed Road, PO Box: 114448, Dubai, United Arab Emirates
Phone: +971 50 480 4987
5. Dr. Sherief Elsayed
Dr. Sherief Elsayed practices exclusively in spine surgery, working across degenerative, traumatic, and structural spinal conditions. His training in the UK shaped a focused approach to spine-only practice, covering both surgical and non-surgical management depending on the condition. He routinely evaluates issues affecting the neck, mid-back, and lower back.
Currently seeing patients in Dubai, his work includes spinal decompression, stabilization, and treatment of complex pathologies such as tumors and fractures. His clinical style reflects a careful assessment process, with surgery considered only when conservative options are not sufficient.
Key Highlights:
UK-trained consultant spine surgeon
Practice limited exclusively to spine conditions
Experience with degenerative and traumatic spine disorders
Address: OrthoPro Clinic South Tower, Dubai Science Park Towers – 3rd Floor – Al Barsha – Al Barsha South – Dubai
Phone: +971 52 105 2798
6. Dr. Usama Saleh
Dr. Usama Saleh works across orthopedic surgery with a clinical focus that includes spine and back-related conditions alongside joint and sports injuries. His background includes fellowship training in upper extremity and knee surgery, which shapes a practical approach to musculoskeletal care where spine pain is often connected to movement, posture, or injury rather than isolated symptoms. In day-to-day practice, he manages both surgical and non-surgical cases depending on how the condition affects function and recovery.
Practicing in Dubai, he sees a wide range of patients, from those dealing with chronic back discomfort to individuals recovering from trauma or sports-related injuries. Spine care in his work is typically part of a broader orthopedic plan, especially when pain overlaps with hip, knee, or postural issues. Treatment plans tend to be structured, step-by-step, and focused on restoring movement without unnecessary intervention.
Key Highlights:
Orthopedic surgeon with spine and back care experience
Fellowship training in joint and extremity surgery
Surgical and non-surgical treatment pathways
Experience with trauma and sports-related spine issues
Address: 22 A street, From Sheikh Zayed Road, 2nd Interchange – Dubai – United Arab Emirates
Phone: +971567853864
7. Dr. Thaer Darwish
Dr. Thaer Darwish specializes in neurosurgery and spine surgery, with clinical work covering both spinal and brain-related conditions. His training spans Germany and the United States, and his experience includes managing complex spinal disorders using modern surgical techniques. Much of his work involves cases where neurological symptoms and spinal structure are closely linked.
Currently practicing in Dubai, he focuses on minimally invasive and robotic spine surgery when appropriate, particularly for patients with degenerative conditions, spinal compression, or instability. His role often includes evaluating complex cases, planning surgical correction, and overseeing long-term follow-up for patients with chronic or progressive spine issues.
Key Highlights:
German board-certified neurosurgeon and spine surgeon
Experience with complex spine and neurological cases
Dr. Ahmed Abouelhamd works primarily with orthopedic spine conditions, focusing on both degenerative and trauma-related disorders. His clinical work involves evaluating spinal alignment, disc health, and nerve involvement, with attention to accurate diagnosis before deciding on treatment. He is trained in modern orthopedic spine techniques and applies both conservative and surgical methods in practice.
Based in Dubai, his patient work includes adults with chronic back pain as well as individuals recovering from spinal injuries. His approach typically emphasizes clear communication around treatment options and realistic recovery planning, especially for patients managing long-term spine conditions.
Key Highlights:
German board-trained orthopedic spine surgeon
Experience with degenerative spine disease and trauma
Balanced use of conservative and surgical care
Focus on structured diagnosis and planning
Services:
Conservative spine treatment
Surgical spine procedures
Degenerative disc disease management
Spine trauma care
Orthopedic spine consultations
Contact Information:
Website: dr-alhamd.com
Email: care@dr-alhamd.com
Facebook: www.facebook.com/dr.aboualhamd
LinkedIn: www.linkedin.com/in/ahmed-abouelhamd
Instagram: www.instagram.com/dr.abouelhamd
Address: Plot No. 598-122, Street 1, Behind Falcon House, Dubai Investment Park 1 (DIP 1), Green Community Village, Dubai, United Arab Emirates
Phone: +971 58 57777 58
9. Dr. Antony Louis Rex Michael
Dr. Antony Louis Rex Michael practices orthopedic spine surgery with experience in both adult and pediatric spinal conditions. His work includes managing structural spine disorders that affect posture, balance, and movement over time. Clinical care often involves evaluating spinal curvature and degenerative changes that develop gradually rather than from acute injury.
Practicing in Dubai, he works with patients dealing with scoliosis, kyphosis, and chronic neck or lower back pain. His spine-related care typically combines careful assessment with long-term management strategies, especially in cases where spinal alignment plays a central role in symptoms.
Key Highlights:
Orthopedic spine surgeon
Experience with adult and pediatric spine conditions
Focus on spinal alignment and deformities
Management of chronic spine disorders
Services:
Scoliosis and kyphosis treatment
Neck and back pain management
Degenerative spine condition care
Pediatric spine treatment
Spine-related orthopedic procedures
Contact Information:
Website: michaelspinesurgeon.com
Email: alrexmichael@gmail.com
Instagram: www.instagram.com/drmichaeldubaispine
Address: 12, American Hospital – 15th St – Oud Santa Metha – Dubai
Phone: 04 377 5500
Conclusion
Spine problems are rarely simple, and neither is choosing the right specialist to handle them. What becomes clear when looking across these surgeons is how varied spine care in Dubai really is. Some focus on complex surgical reconstruction, others on minimally invasive techniques or long-term pain management, and some approach spine issues through a broader orthopedic or neurological lens. That range matters, because back and neck problems do not all come from the same place or follow the same path.
The surgeons covered in this article reflect that diversity. Each of them works within a specific area of spine care, shaped by training, experience, and the types of patients they see most often. For anyone dealing with a spinal condition, the real value lies in matching the problem to the right expertise, not chasing labels or titles. In a city like Dubai, where spine care spans conservative treatment to highly complex surgery, patients have the option to choose a specialist whose approach fits their condition, expectations, and long-term goals.